Operation Warlord
Ground Branch will strike a hostile support belt built around a fuel storage site, a west radar station, and an ammunition depot inside the Seal Islands - Restricted Area 01 corridor. The mission is designed to cripple enemy sustainment and information control while simultaneously recovering allied points of contact tied to Charlie team.
Situation
The enemy is holding three infrastructure nodes that directly support its ability to fight in the region: fuel, radar coverage, and ammunition. Reclaiming those sites weakens hostile warfighting capacity while strengthening allied freedom of movement in the surrounding area.
The raid is coupled with a rescue track for local allied contacts associated with Charlie team. Each objective therefore carries both a strike task and a personnel recovery requirement, which makes controlled tempo more important than a simple smash-and-grab approach.
Execution
- Insert Lift from Black Site Wolverine aboard an Overseer helicopter, conduct a high-altitude jump into the AO, regroup, and move on foot.
- Alpha Secure the fuel storage site with minimal damage to infrastructure and recover Charlie team’s first point of contact.
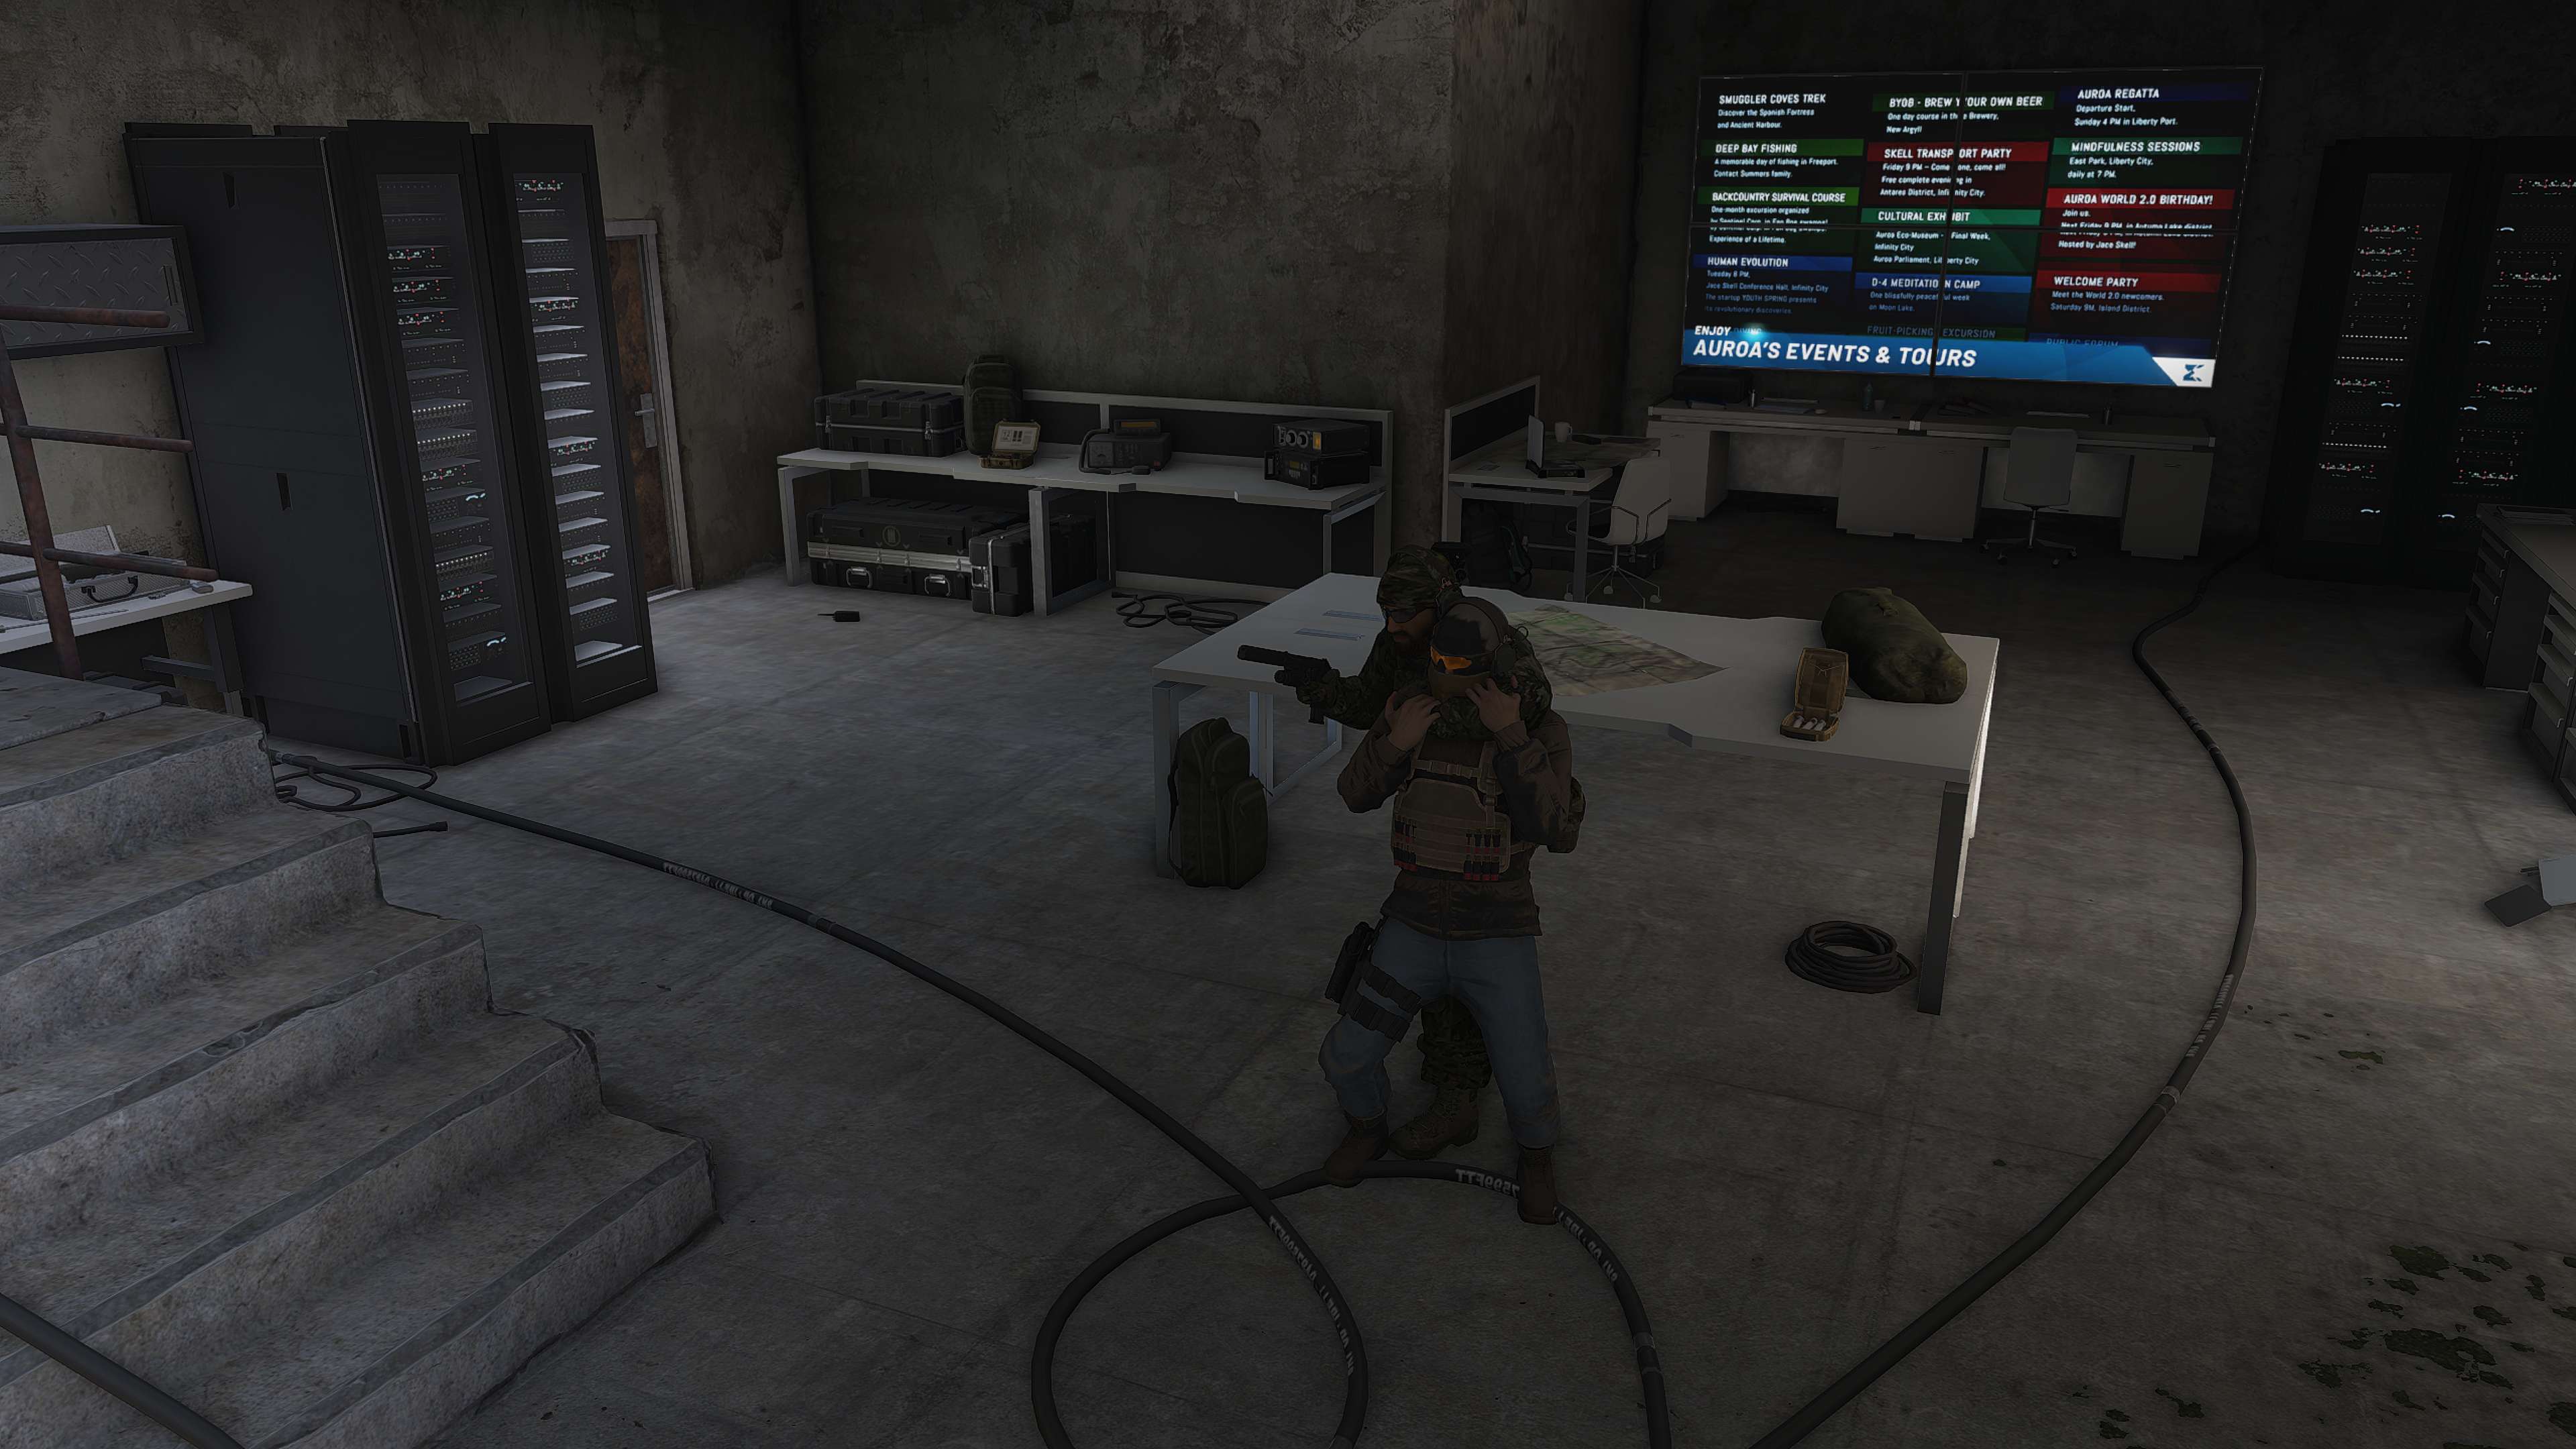
- Bravo Take the west radar station, kill Phoenix on sight, document the ID, rescue the Outcast scout, and seize the COMMS NET after collecting movement intel.
- Charlie Raid the ammunition depot, hold the stockpile for local allies, capture Specter alive, secure the final allied POC, and return to Black Site Wolverine.
Priority Intel
Phoenix at Bravo is the enemy cyber warfare specialist responsible for OPSEC disruption and is a hard kill target. Specter at Charlie is the more valuable capture, with knowledge of upcoming operations that justifies immediate live extraction.
As originally briefed, HVT identity can be roleplayed if needed. Additional targets of opportunity threatening allied forces are already greenlit, but Alpha still requires discipline to avoid wrecking infrastructure meant to be handed back to friendly control.
Mission End State
Fuel, radar, and ammunition assets are denied to the enemy, all allied contacts are recovered, the hostile communications network is turned, Phoenix is confirmed dead, Specter is extracted alive, and Ground Branch returns to Black Site Wolverine with the AO reset in favor of allied forces.
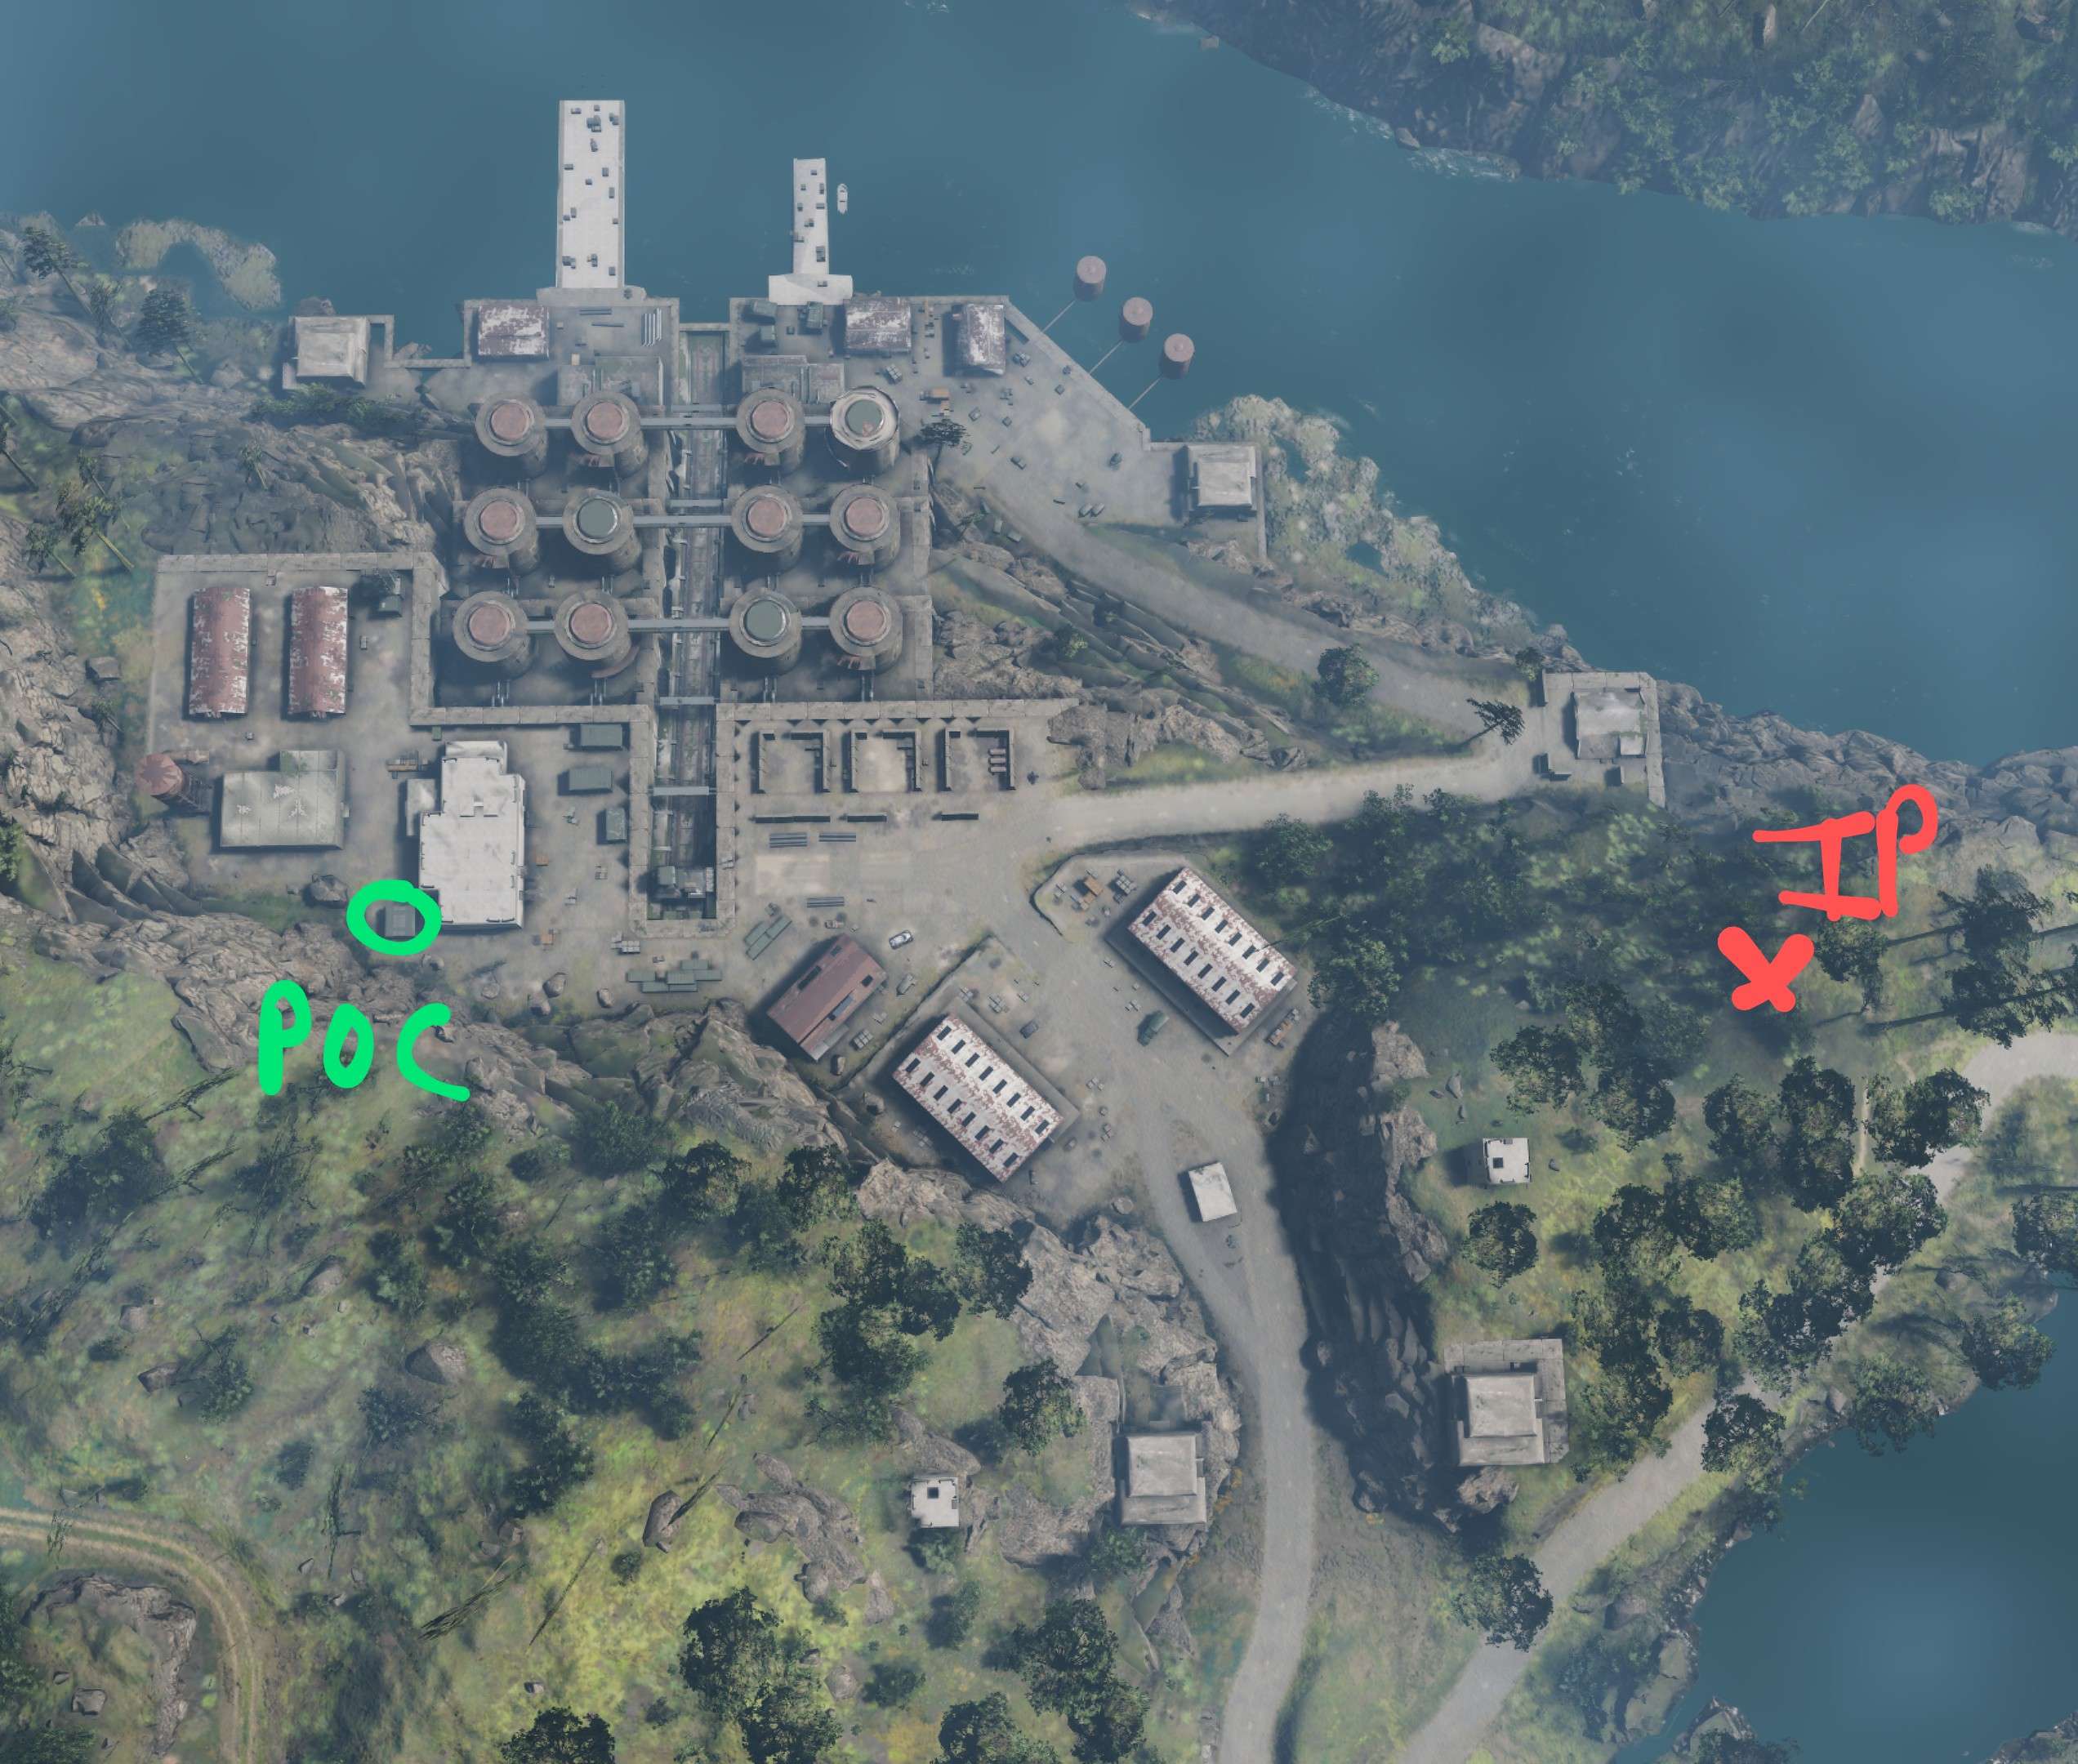
Fuel Storage Facility
Secure the site intact enough for allied reuse while recovering Charlie team’s first point of contact from inside the objective area.
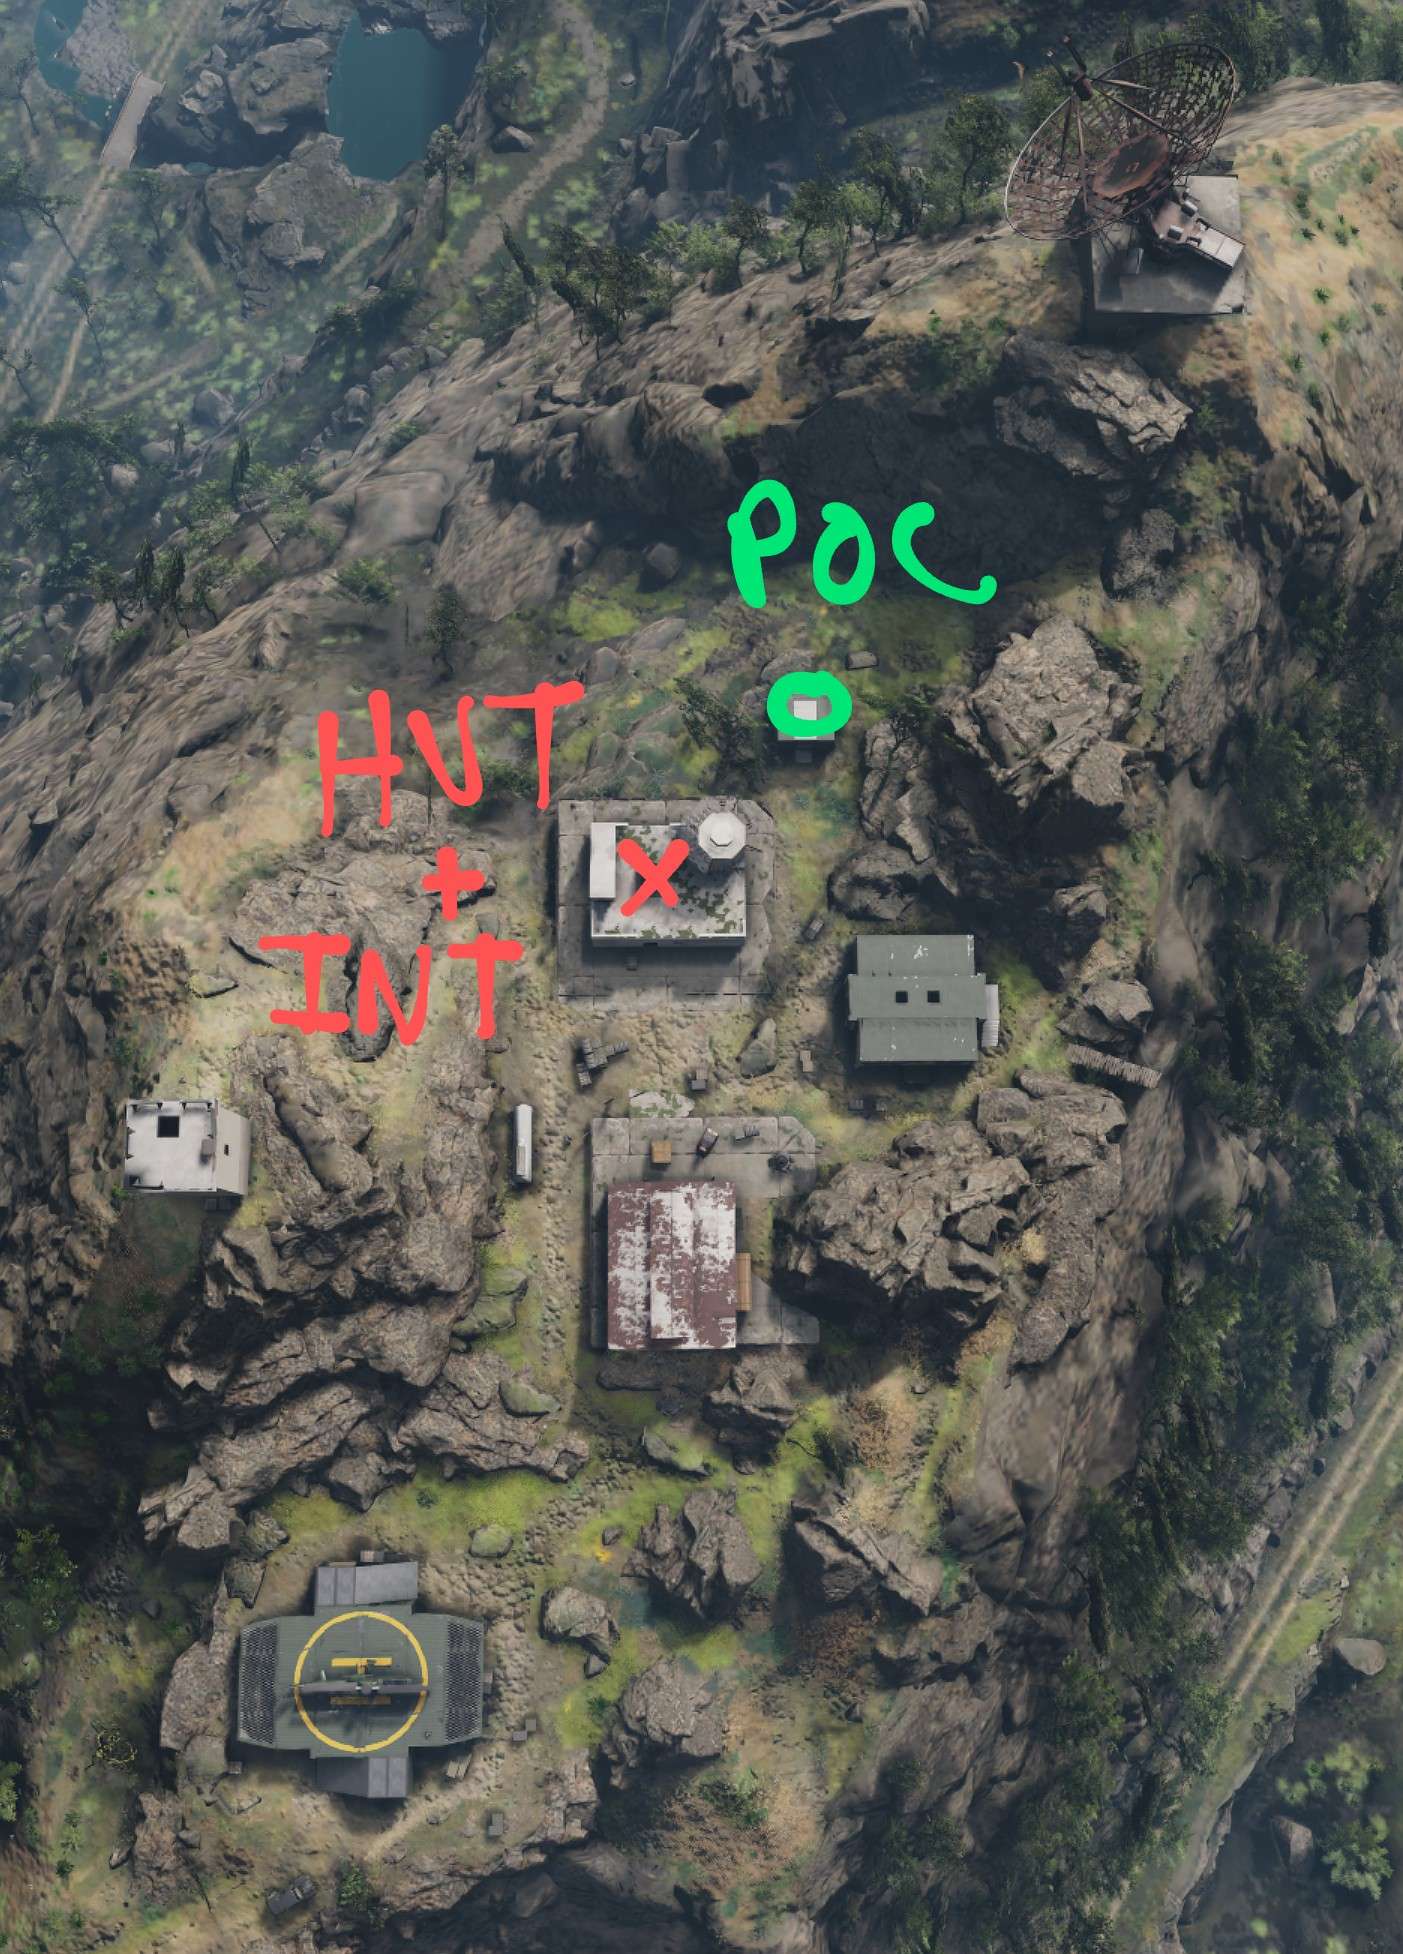
West Radar Station
Kill Phoenix, photograph the ID confirmation, rescue the allied scout, and flip control of the communications net after collecting local movement intelligence.
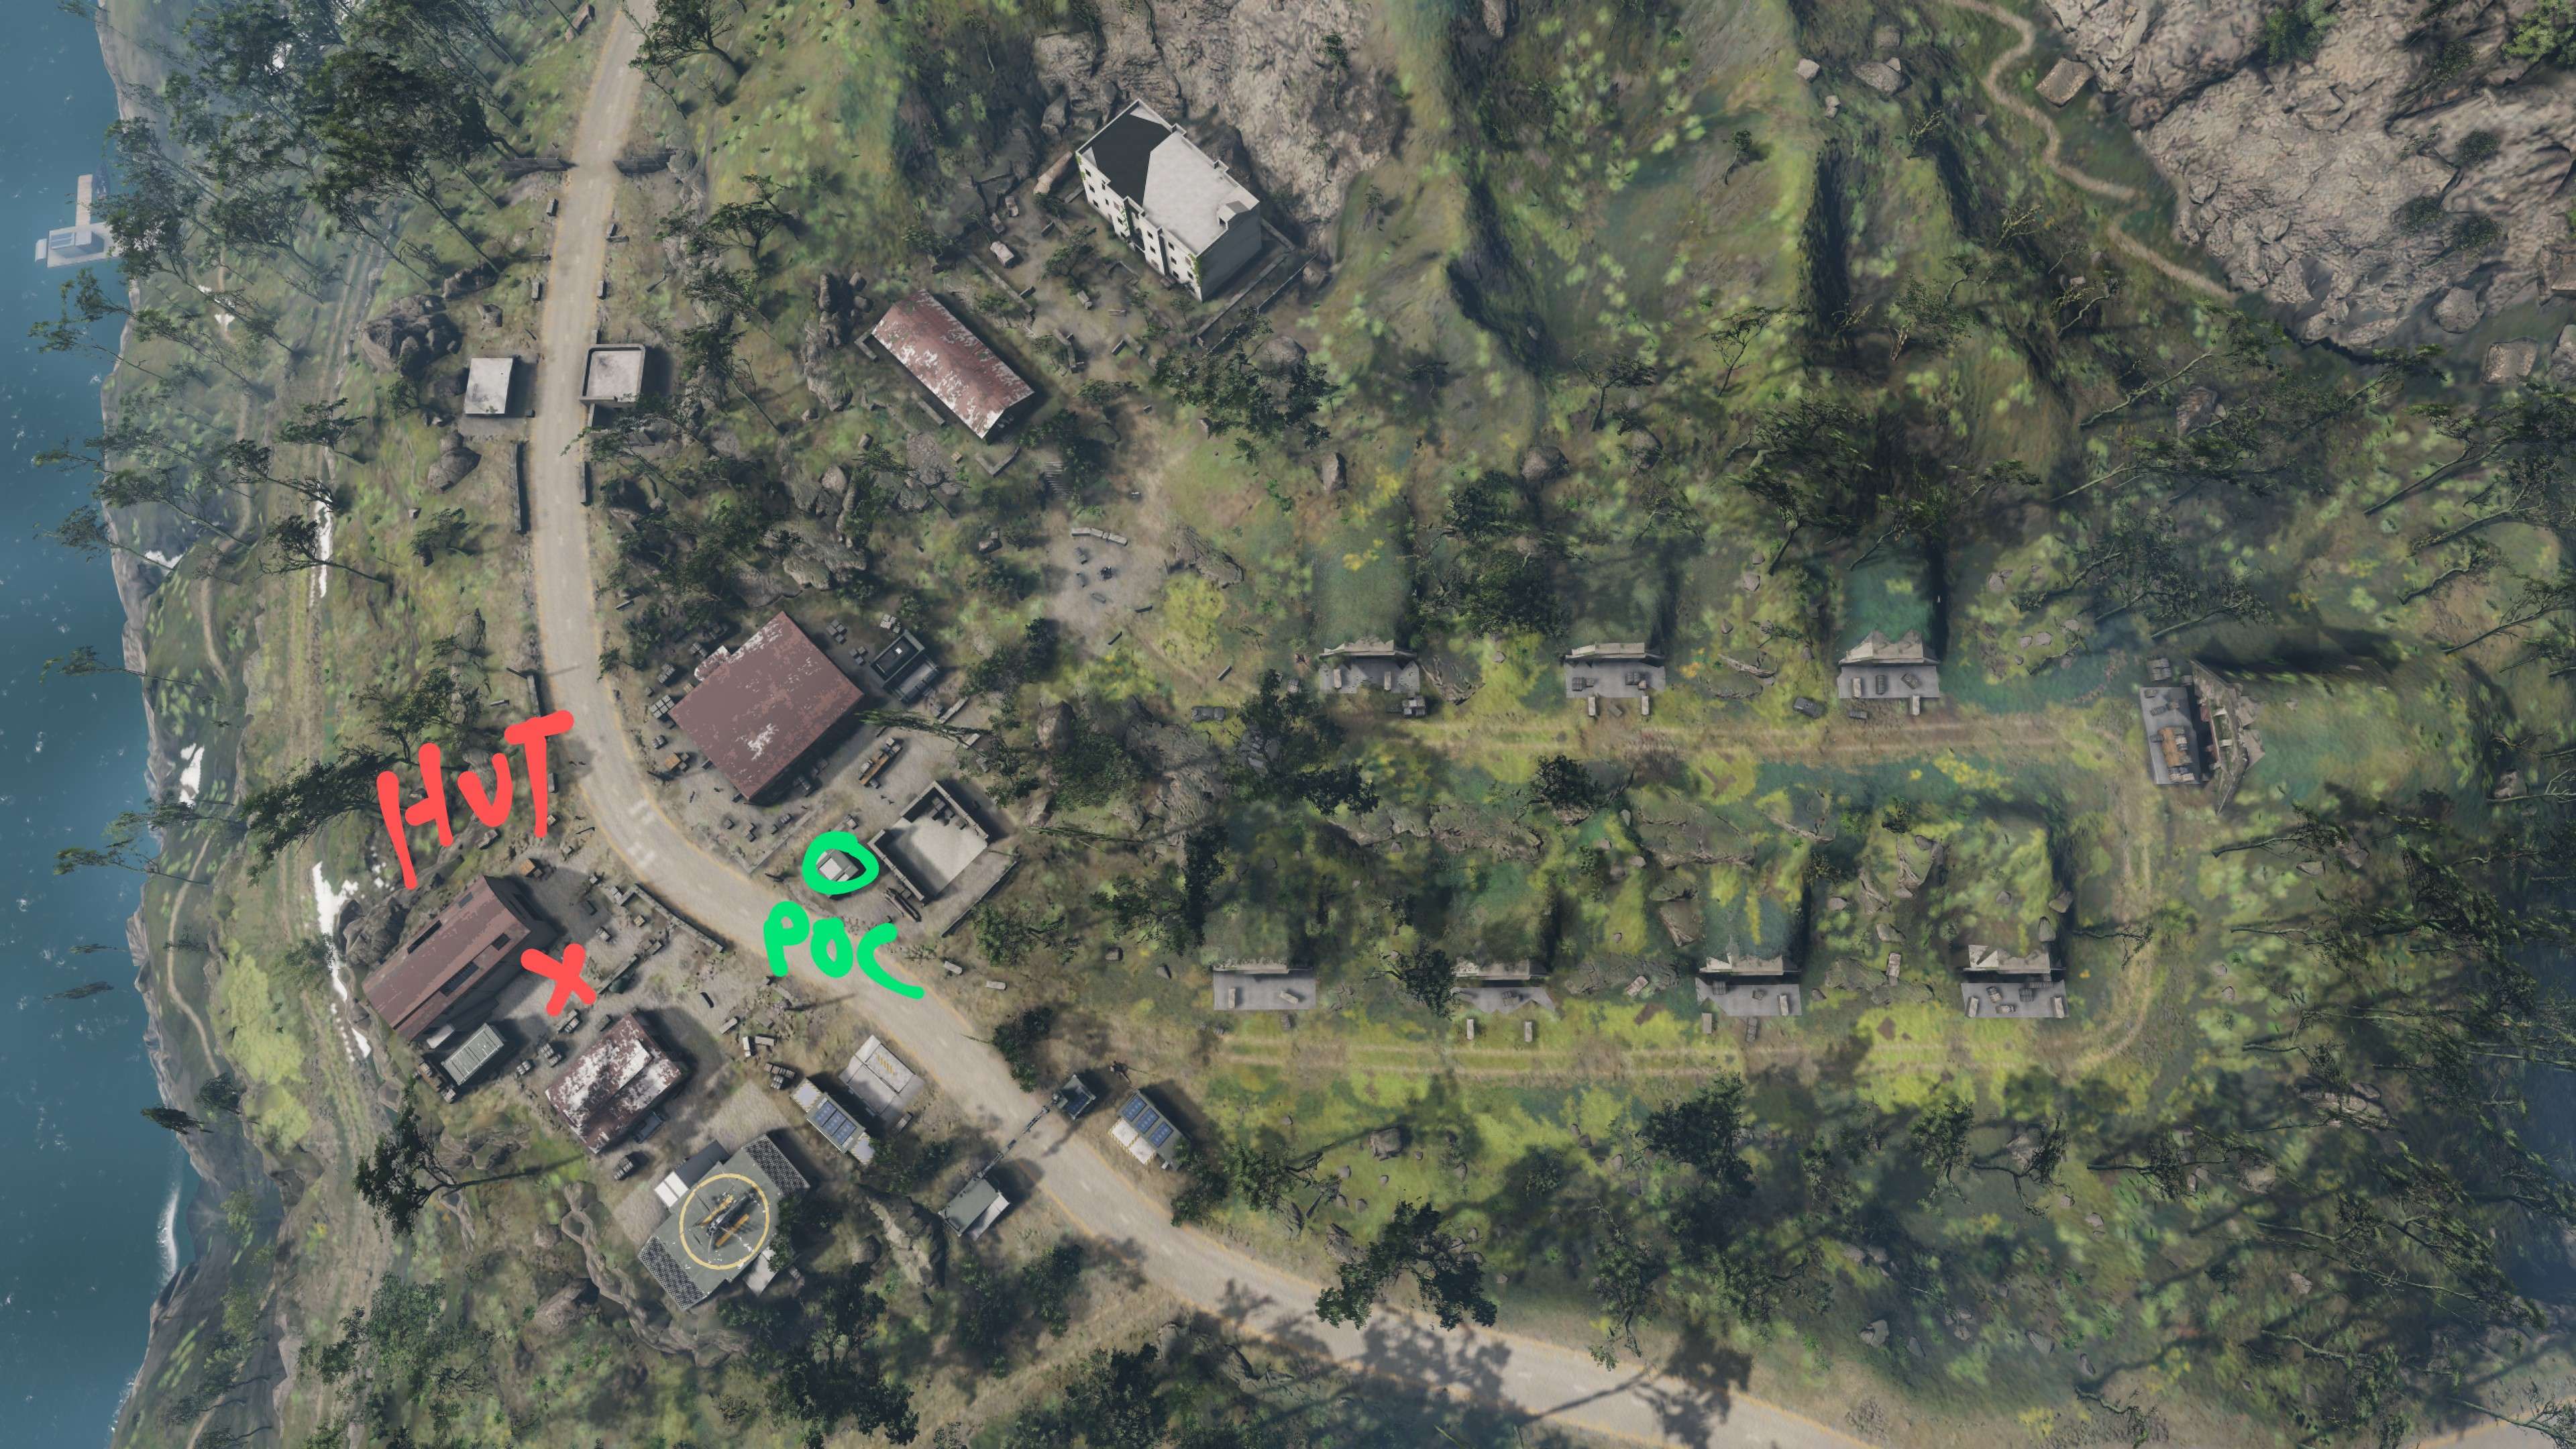
Ammunition Storage Depot
Secure the munitions stockpile for allied use, capture Specter alive, and protect the final friendly point of contact before exfiltration.
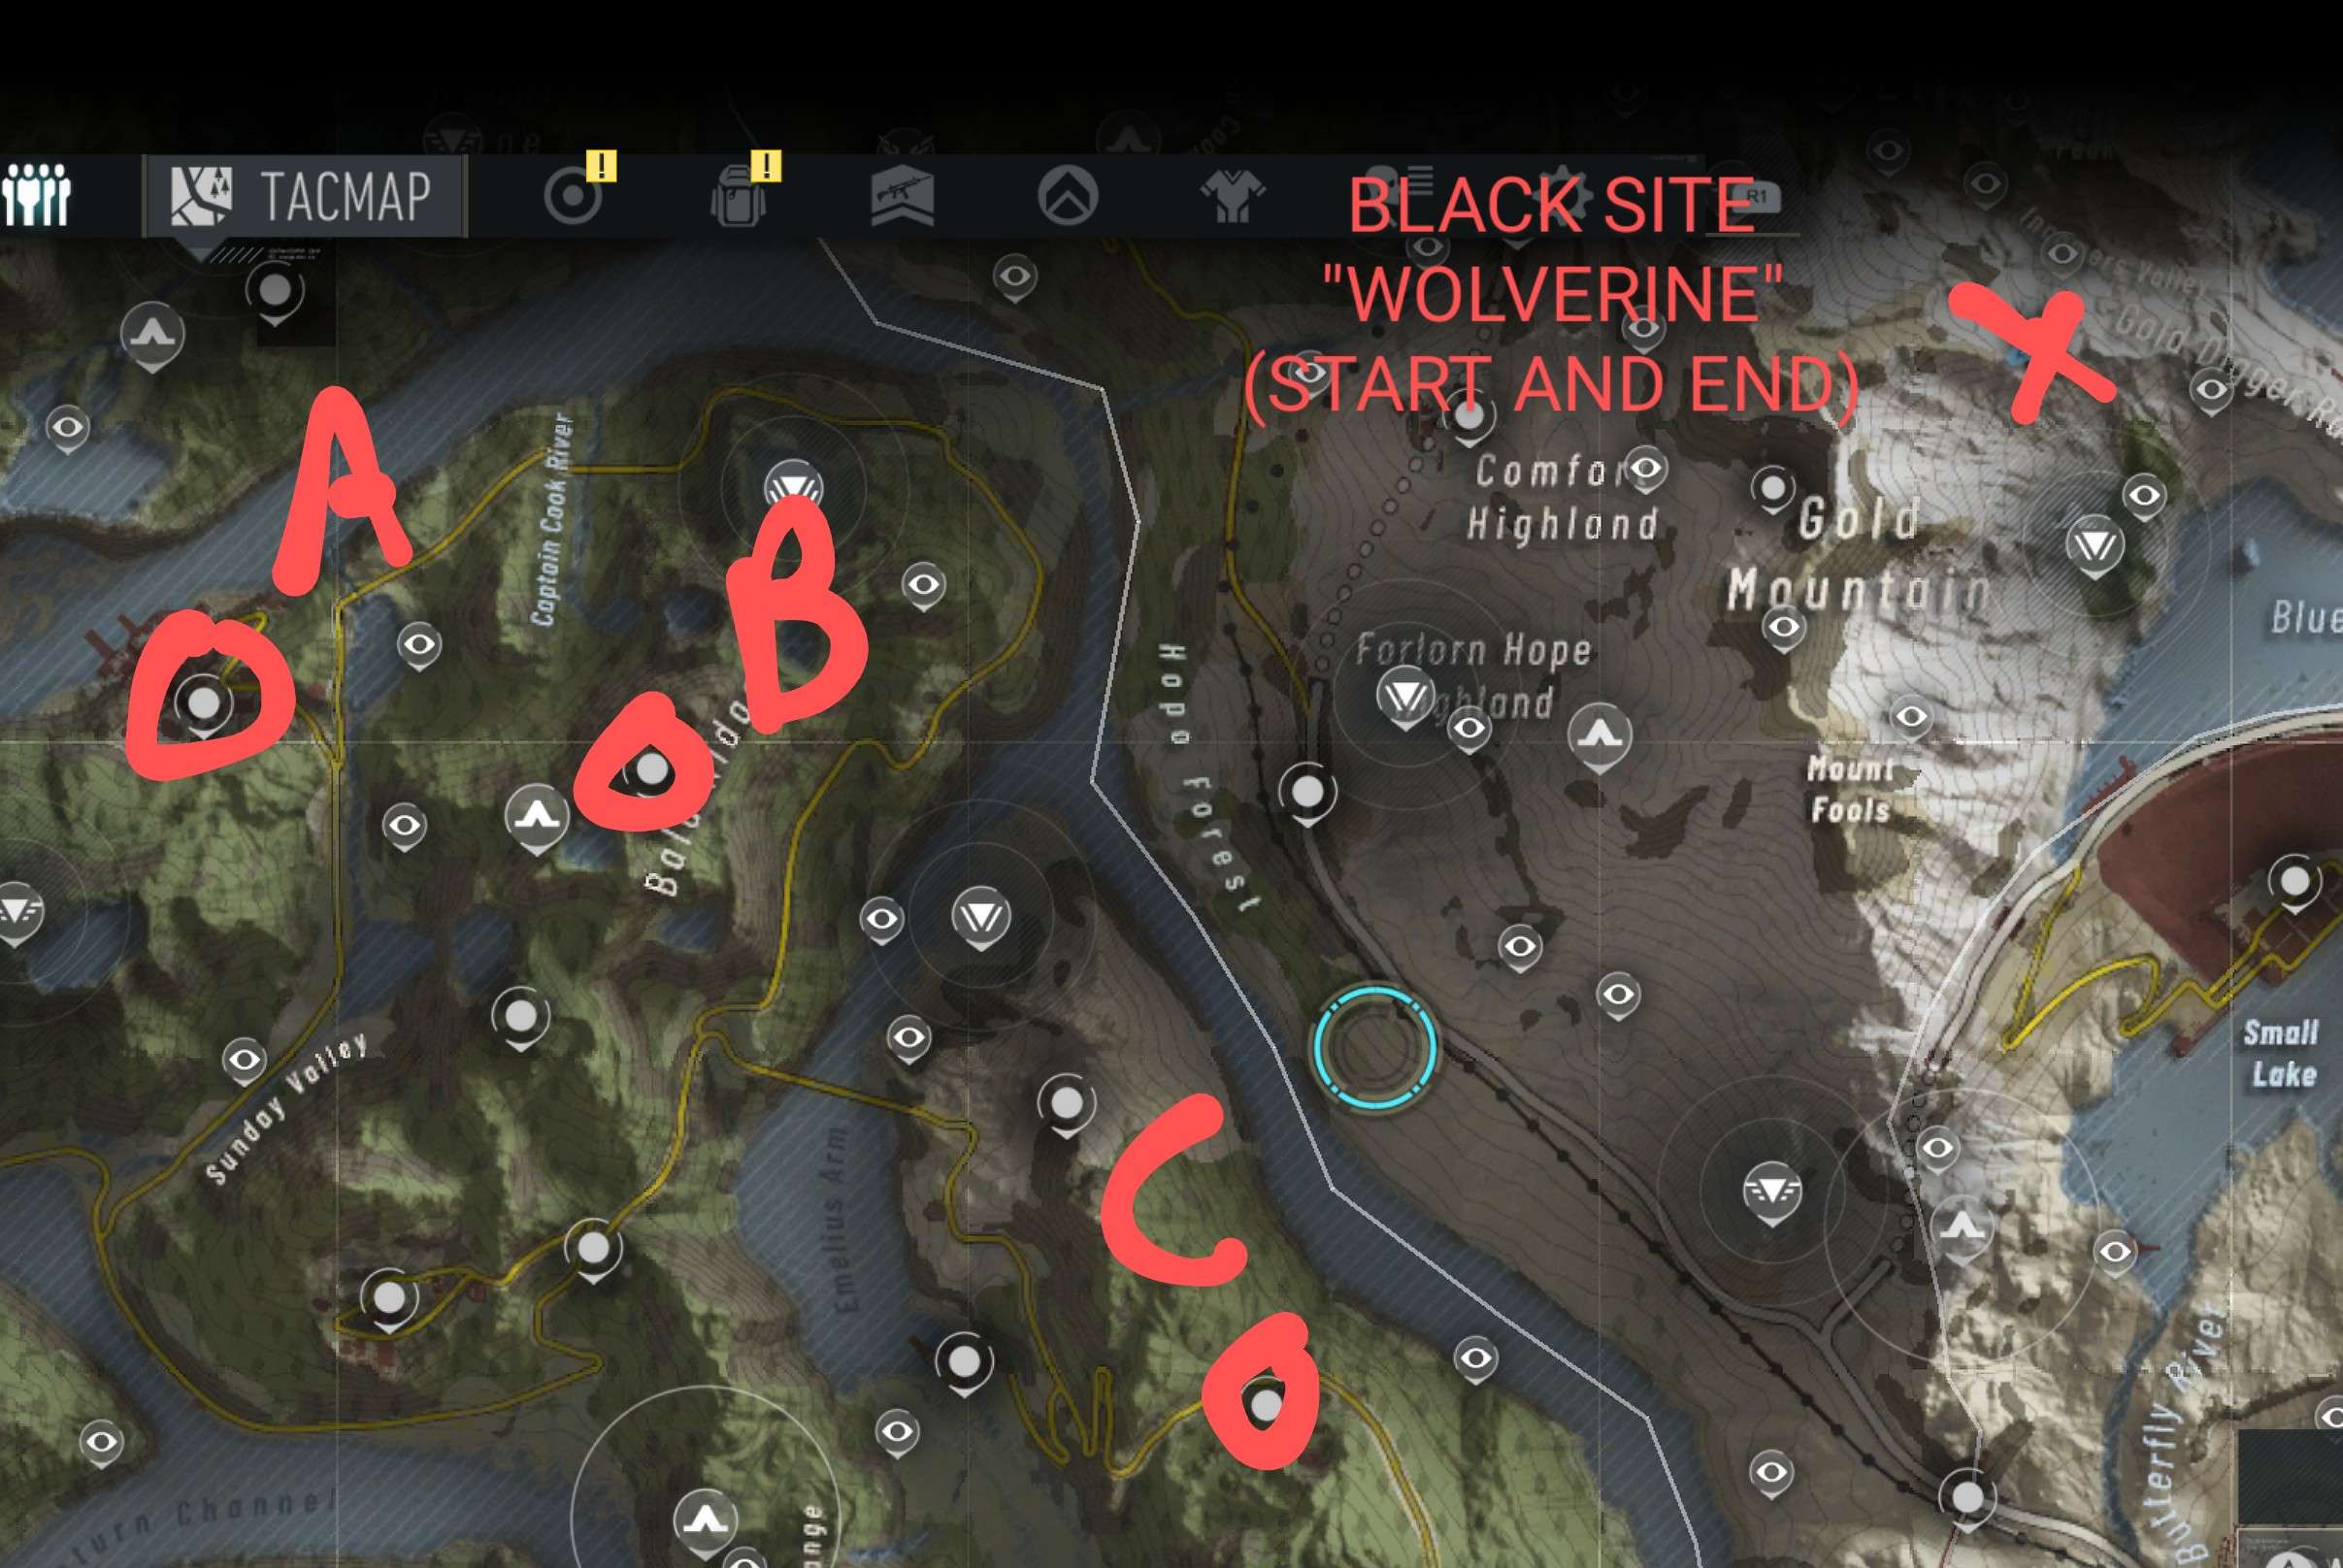
Tacmap
Seal Islands - Restricted Area 01 reference showing Black Site Wolverine as the start and finish point with all three mission objectives along the route.
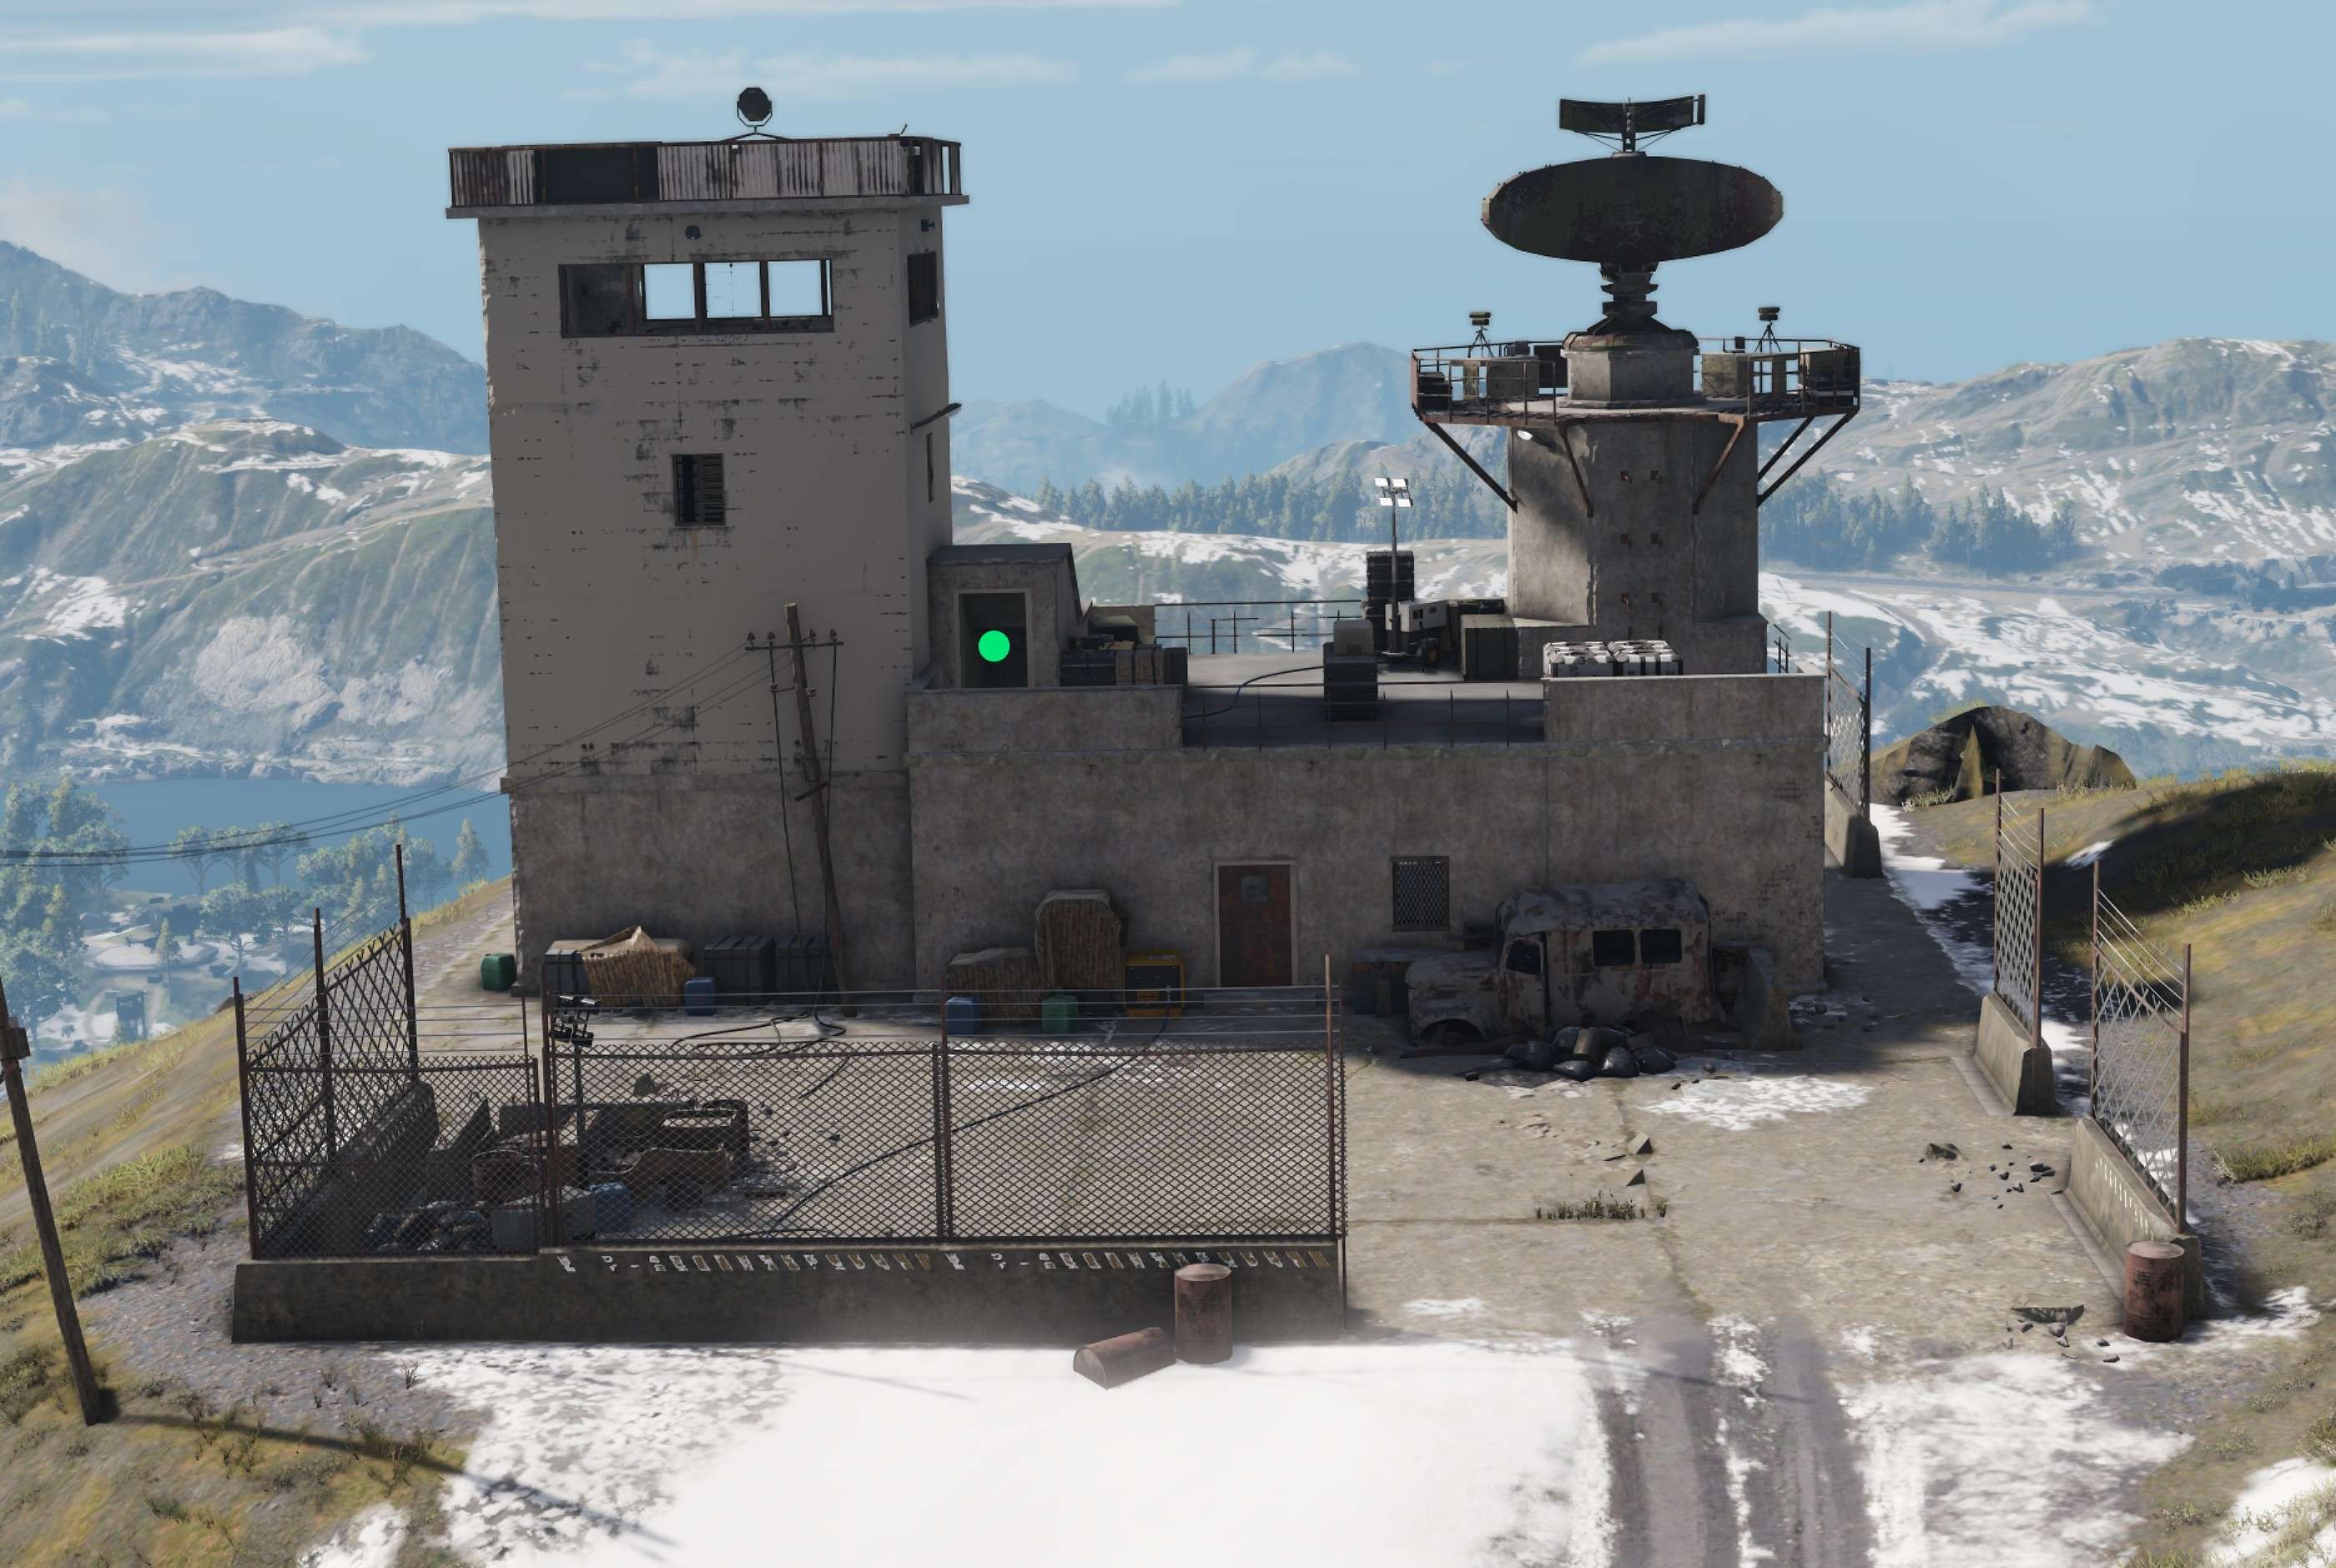
Black Site Access
Ground-level doors are sealed. Re-entry is through the roof access on the smaller building where the staircase door remains usable.
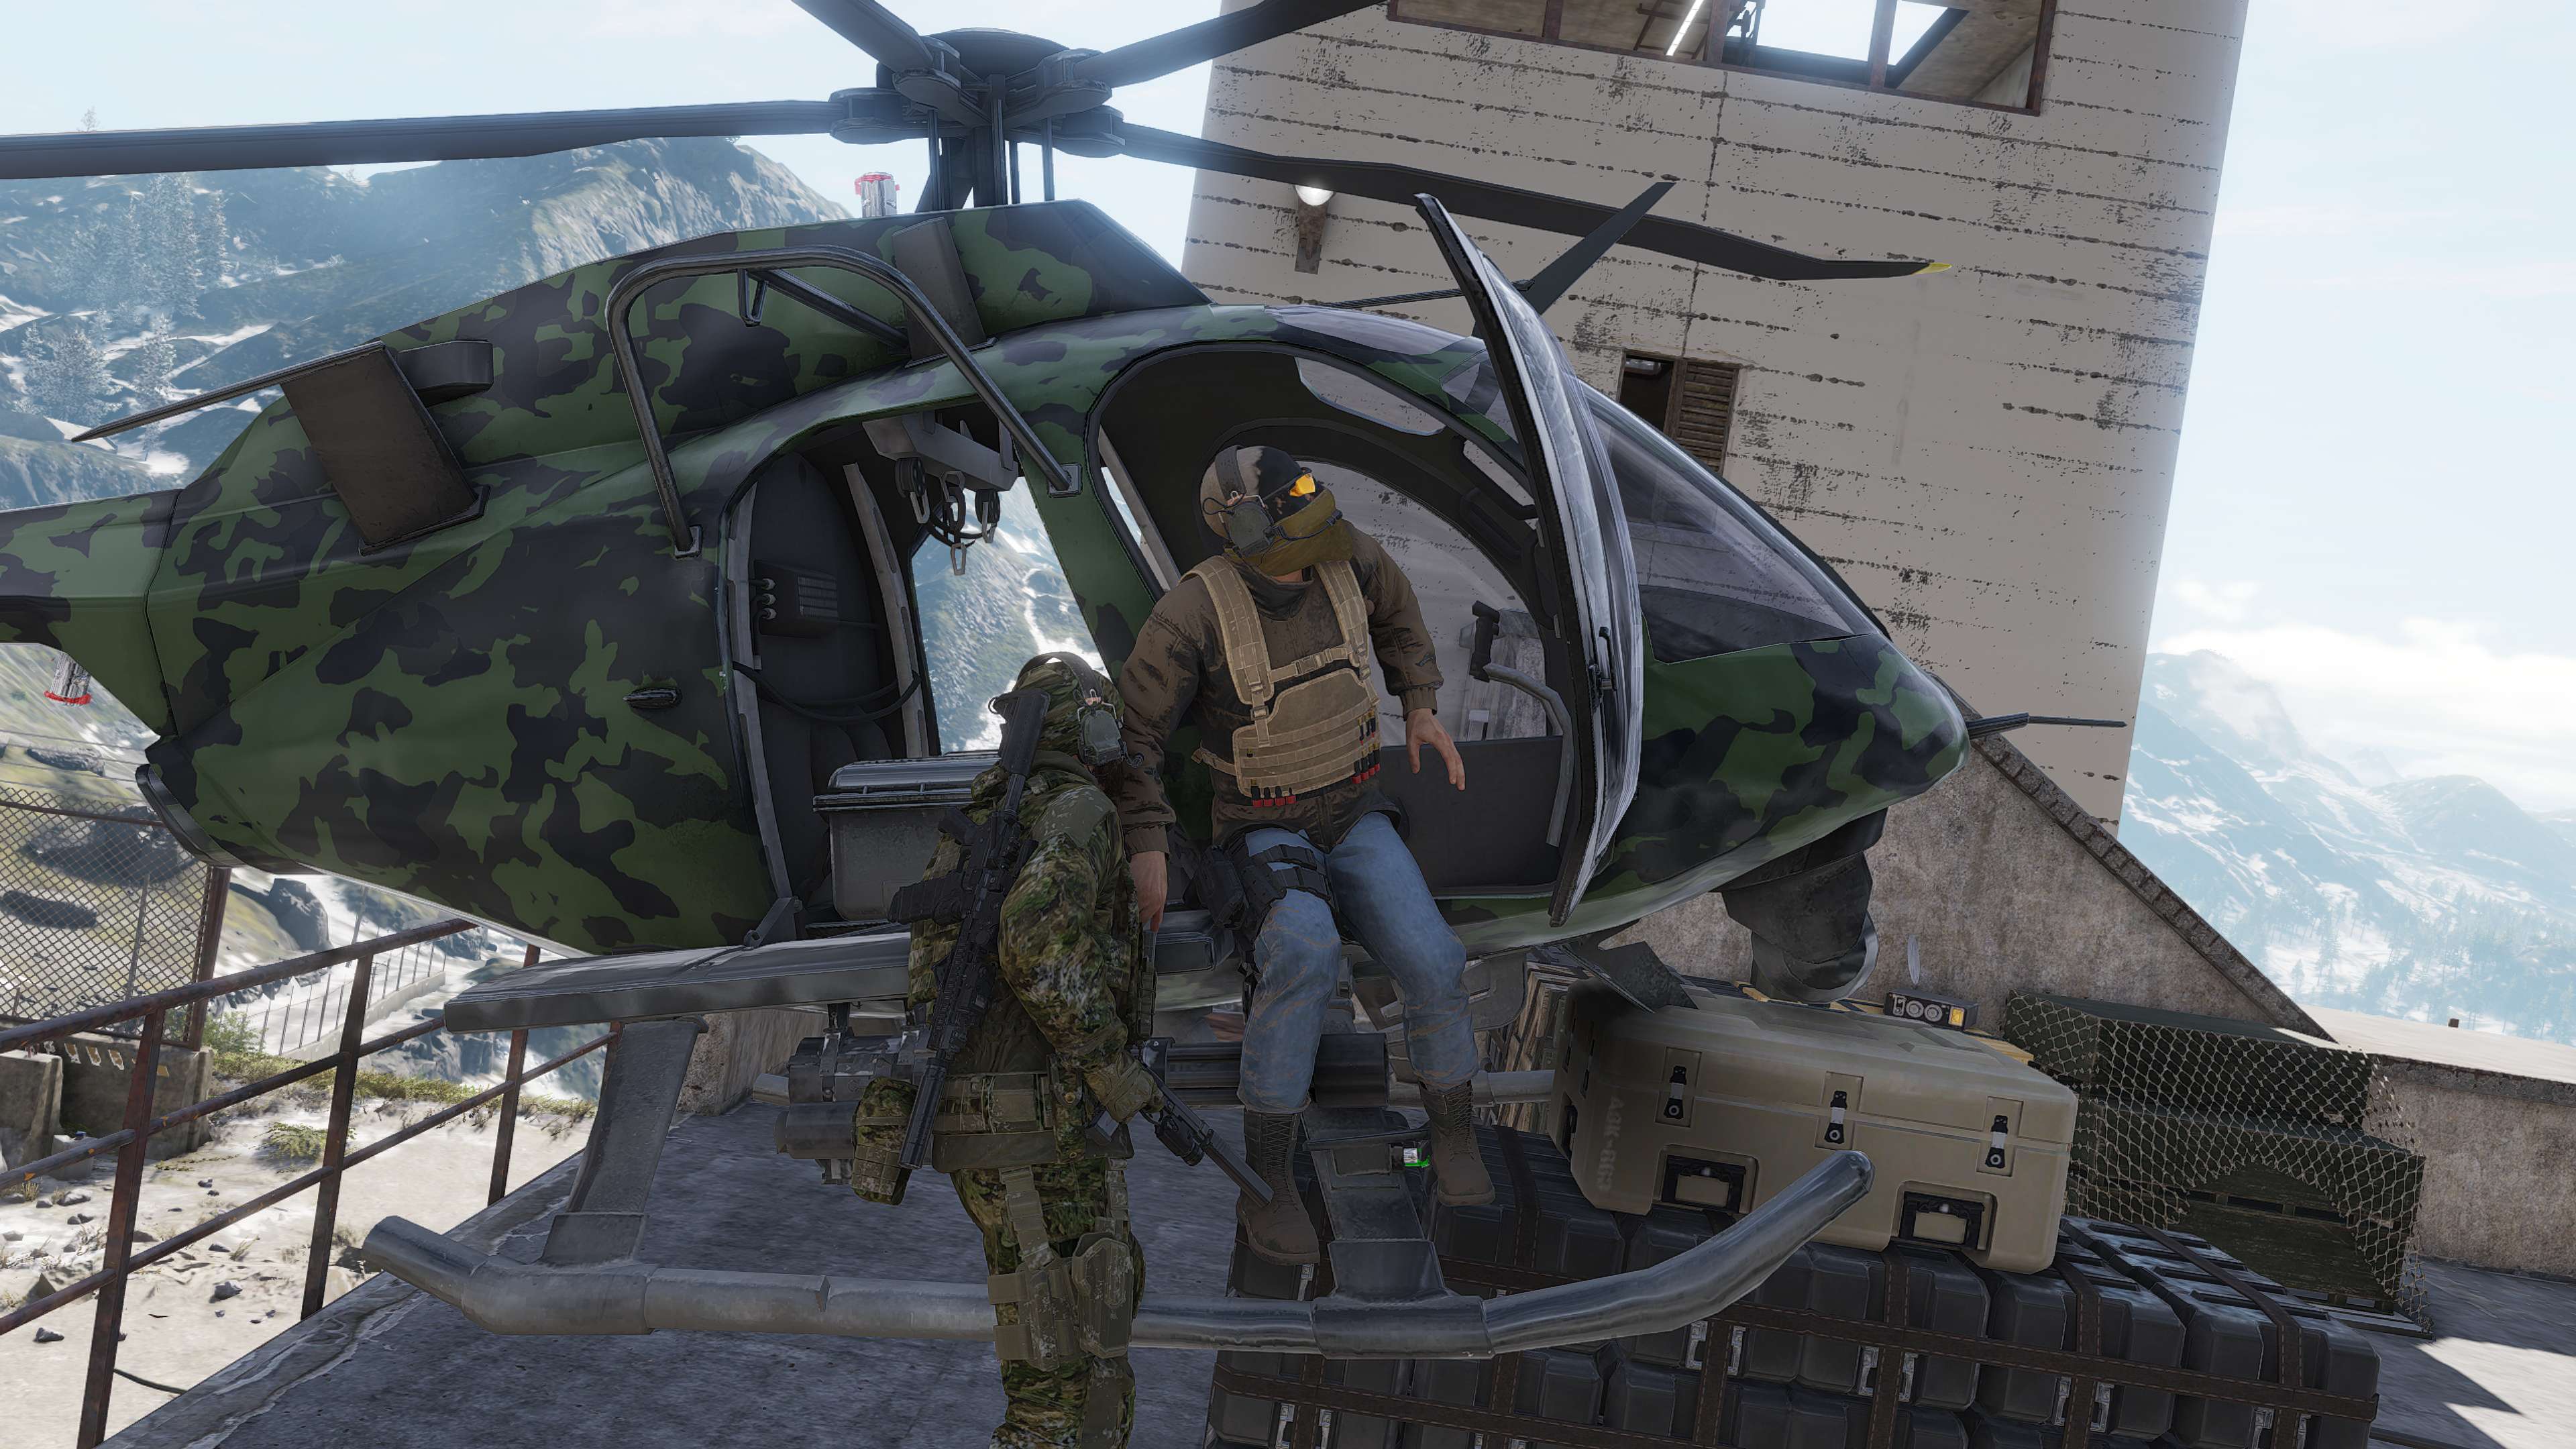
Roof Landing Reference
A competent pilot can land a team and captured HVT directly onto the roof entry point for clean mission recovery.
Extraction Setup
Secondary reference for the Black Site Wolverine rooftop approach during final HVT recovery and debrief handoff.