
Operation Staghorn
Sentinel’s Eclipse unit has surged into Liberty City and is actively abducting civilians into a trafficking pipeline. QRF will infil from Seal Passage in low-profile civilian clothing, move fast through a chain of urban hot zones, clear hostile pockets, assist civilians on contact, and recover intelligence at Liberty Port on where the captives are being moved.
Situation
This is the urban twin of `op-coral`, built around a denser Liberty City environment and the same underlying human-trafficking crisis. Eclipse personnel are abducting civilians, exploiting city blocks as transient holding areas, and moving victims toward an unknown final destination.
The mission is not about holding terrain. It is about speed, civilian protection, and striking every identified hotspot before the trafficking chain can relocate its captives. Every cleared zone should immediately reduce local danger and push the team closer to the logistics answer at Liberty Port.
Execution
- Infil Enter from Seal Passage at sundown in civilian clothes and move with minimal signature through the city edge.
- Urban Sweep Clear the first six hot zones fast, assist civilians, and kill all hostiles or any target of opportunity threatening the rescue tempo.
- Port Exploit Finish at Liberty Port, locate the enemy TOC, and recover intelligence revealing where civilians are being transported.
Priority Intel
The team is explicitly not expected to clear every room in depth. Quick security sweeps are enough as long as the route keeps moving and civilians are stabilized. Delay helps the traffickers more than a perfect sweep does.
The final answer sits at Liberty Port. Every earlier location is a suppression and protection stop, but the port objective is the one that should expose the outbound route for the kidnapped civilians and let follow-on operations hit the pipeline deeper.
Mission End State
Eclipse hot zones across Liberty City are broken up, civilians are rescued or stabilized wherever possible, the trafficking network loses local momentum, and the team leaves Liberty Port with actionable intelligence on the next transfer destination before returning to South Cape Station.
Parliament Shopping Street
Initial urban contact zone. Clear the street fast and protect civilians caught in the first active trafficking pocket.
Thomas Jefferson Residences
Break the residential strongpoint and keep the trafficking route from using apartment cover to stage or sort captives.
Auroa Parliament
Retake the government-sector hotspot and prevent Eclipse from turning a symbolic civic site into a transit choke point.
Adam Smith District
Suppress the district node quickly and keep the route open for civilian movement away from the core fighting.
Construction Site
Clear the construction block and deny Eclipse another temporary holding area inside unfinished urban structures.
Winter Lake Shopping Street
Remove the final city-center trafficking pocket before the team pushes onto the logistics hub at the waterfront.
Liberty Port
Exploit the enemy TOC and recover the intelligence package showing where Eclipse is taking the abducted civilians.
Hot Zone Route
Primary route reference covering the infiltration point, all urban hot zones, and the final path into Liberty Port.
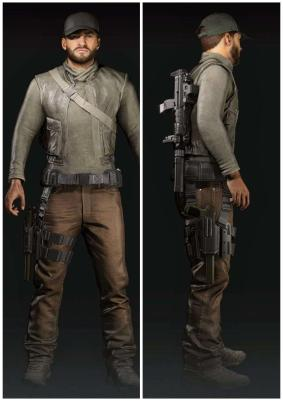
Undercover Kit
Reference for the intended low-profile civilian look: concealed plate carrier, minimum visible military gear, and suppressed SMG or pistol loadout.
Tacmap
Liberty City hot-zone map covering the west-side infil at Seal Passage, the full seven-point objective chain, and the final move to Liberty Port.