Operation Rubedo
Sentinel cells in Smugglers Cove are moving prisoners for a possible exchange tied to a suspected radiological device codenamed PYRAMID. QRF RUBEDO will cut off the trafficking chain, secure civilians at two coastal sites, and capture BADGER at the Spanish Fortress before he disappears back into the tunnel network.
Situation
SIGINT indicates Sentinel is preparing a major move in northwest Smugglers Cove: prisoners are being staged for transport off-island in exchange for a device codenamed PYRAMID, believed to be some form of radiological dispersal weapon. Command is pursuing both the trafficking network and the weapons angle, but immediate action is needed to stop more civilians from disappearing.
ISR has finally fixed HVT BADGER, Sentinel's chief weapons specialist, at the Spanish Fortress. His pattern suggests he has been using an unconfirmed tunnel network to stay off-grid, so this is a narrow capture window.
Execution
- Phase 1 Depart Erewhon by Little Bird, land near the dockside LZ, and patrol the coast on foot toward Alpha with a light, low-signature footprint.
- Phase 2 Secure Wind Farm W01 and Drone Station W011 in sequence, protect civilians, and exploit every comms or data node before pushing inland to Charlie.
- Phase 3 Capture BADGER at the fortress without alerting the wider network, extract his devices, then relocate to Safehouse ECHO 6 for HVT handoff and immediate on-site analysis.
Critical Control
No radio alert can be allowed before BADGER is in custody. If he is spooked, he will likely vanish into the suspected tunnel system and the strike window will close.
HVT Handling
Thermal imagery suggests BADGER is wearing an explosive S-VEST to avoid capture. A hands-on apprehension is required, and an EOD specialist must immediately take over once he is restrained.
Mission End State
Alpha and Bravo stabilized, BADGER handed off alive at ECHO 6, all captured electronics exploited on-site, and the final intelligence package reported directly back to HQ.
Objectives
Wind Farm W01
Secure the compound, ensure civilian safety, sweep the comms building for intelligence, and patrol onward to Bravo.
Drone Station W011
Secure the station, assist civilians, gather actionable intelligence, and continue the foot movement toward Charlie.
Spanish Fortress
Capture BADGER, recover every electronic device on-site, and keep the detention sequence controlled enough for immediate EOD management of the vest threat.
Support References
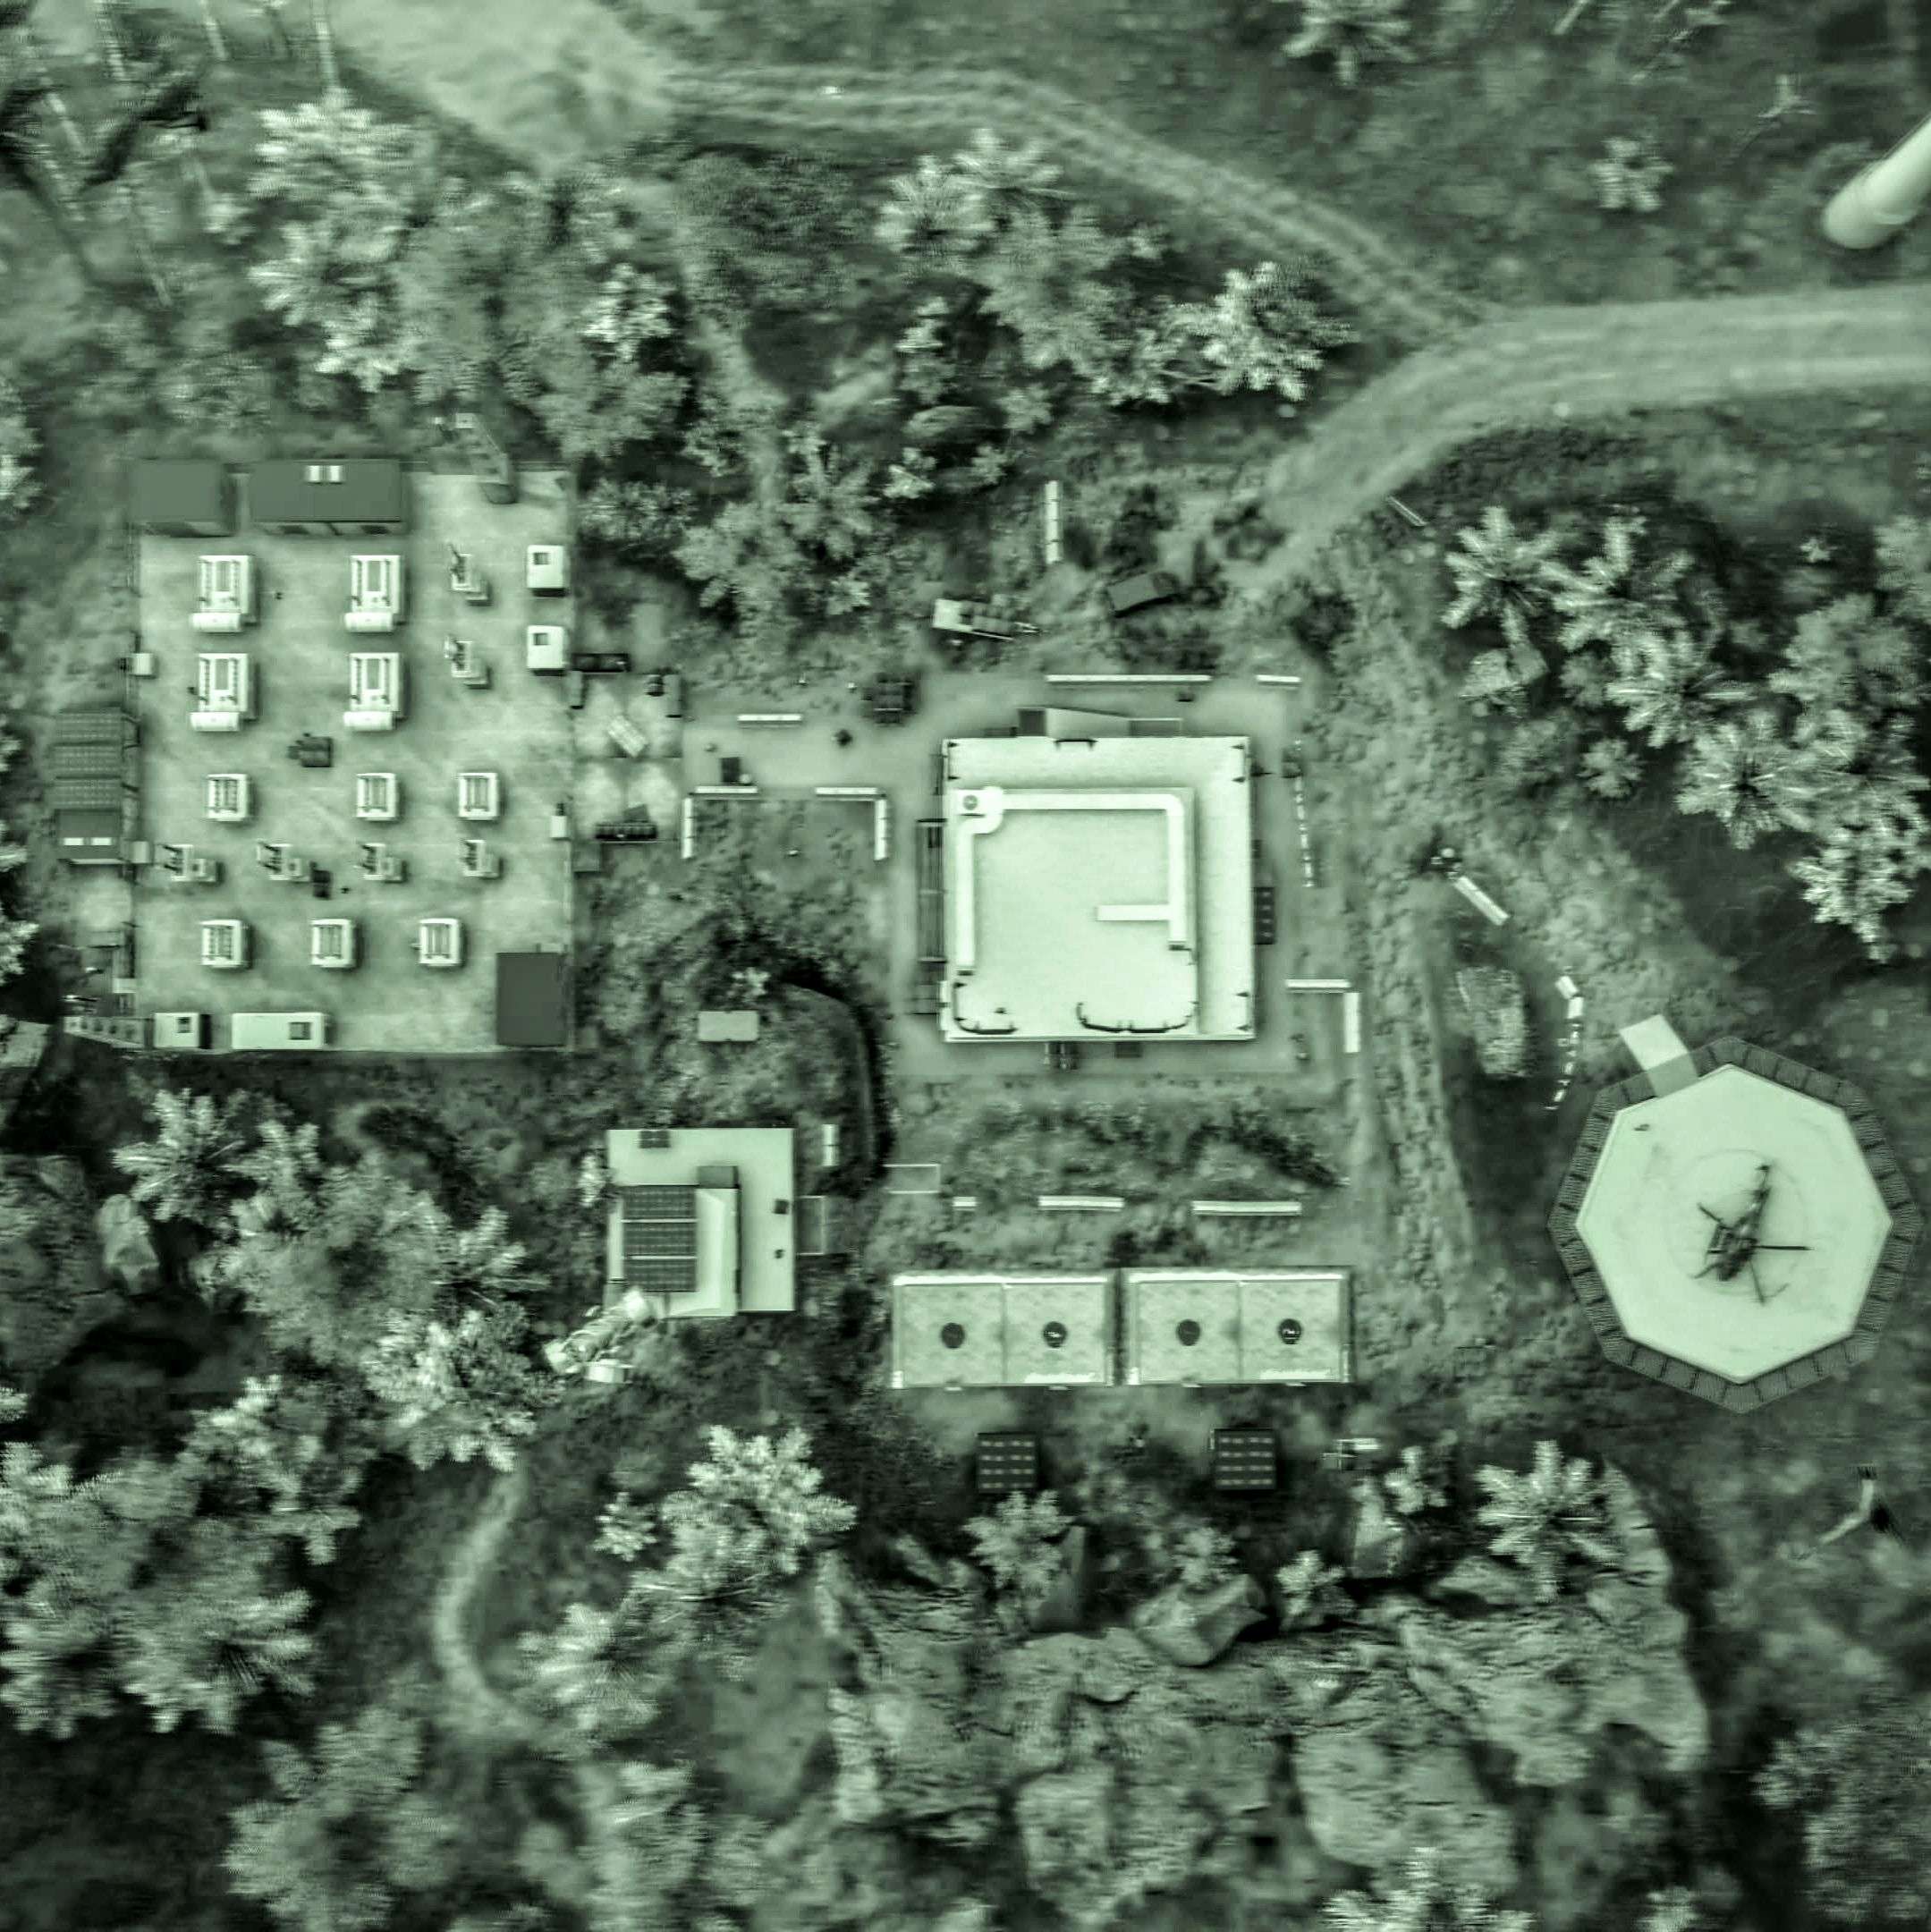
Wind Farm W01
Reference image for the first civilian-protection sweep and the comms-building exploitation point at Alpha.
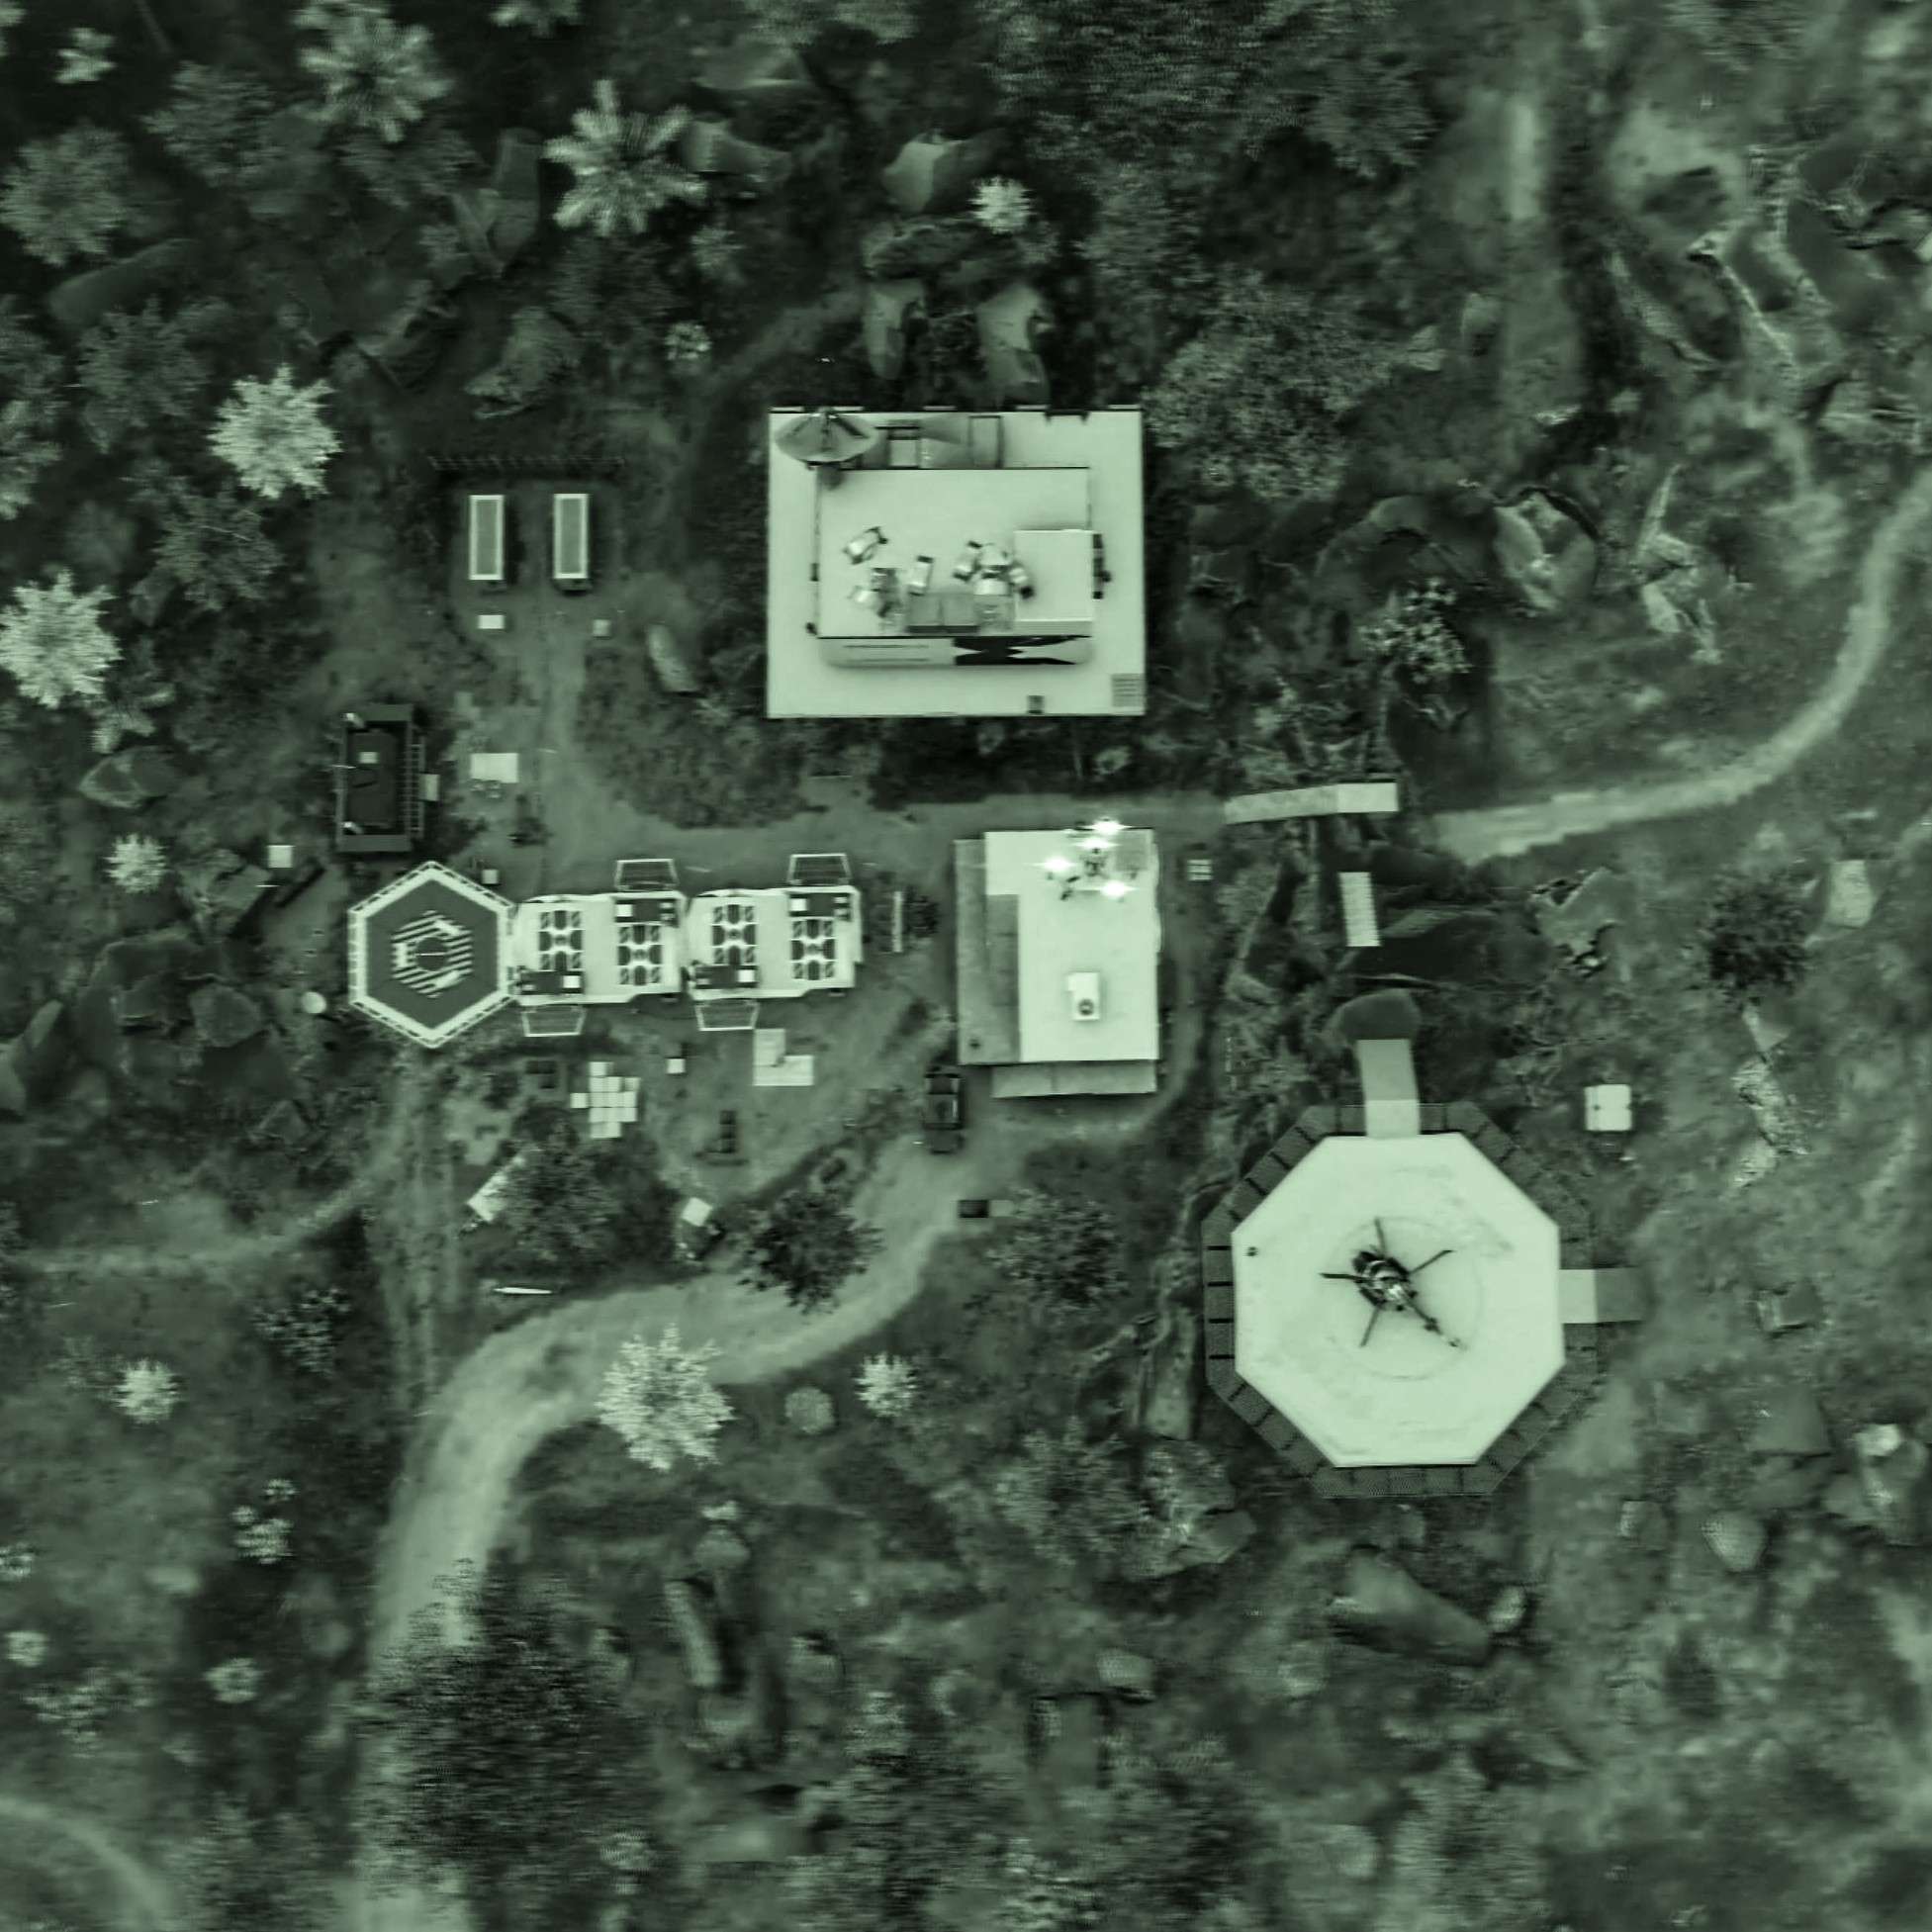
Drone Station W011
Reference image for the second compound sweep where civilian protection continues and the team collects follow-on actionable intel.
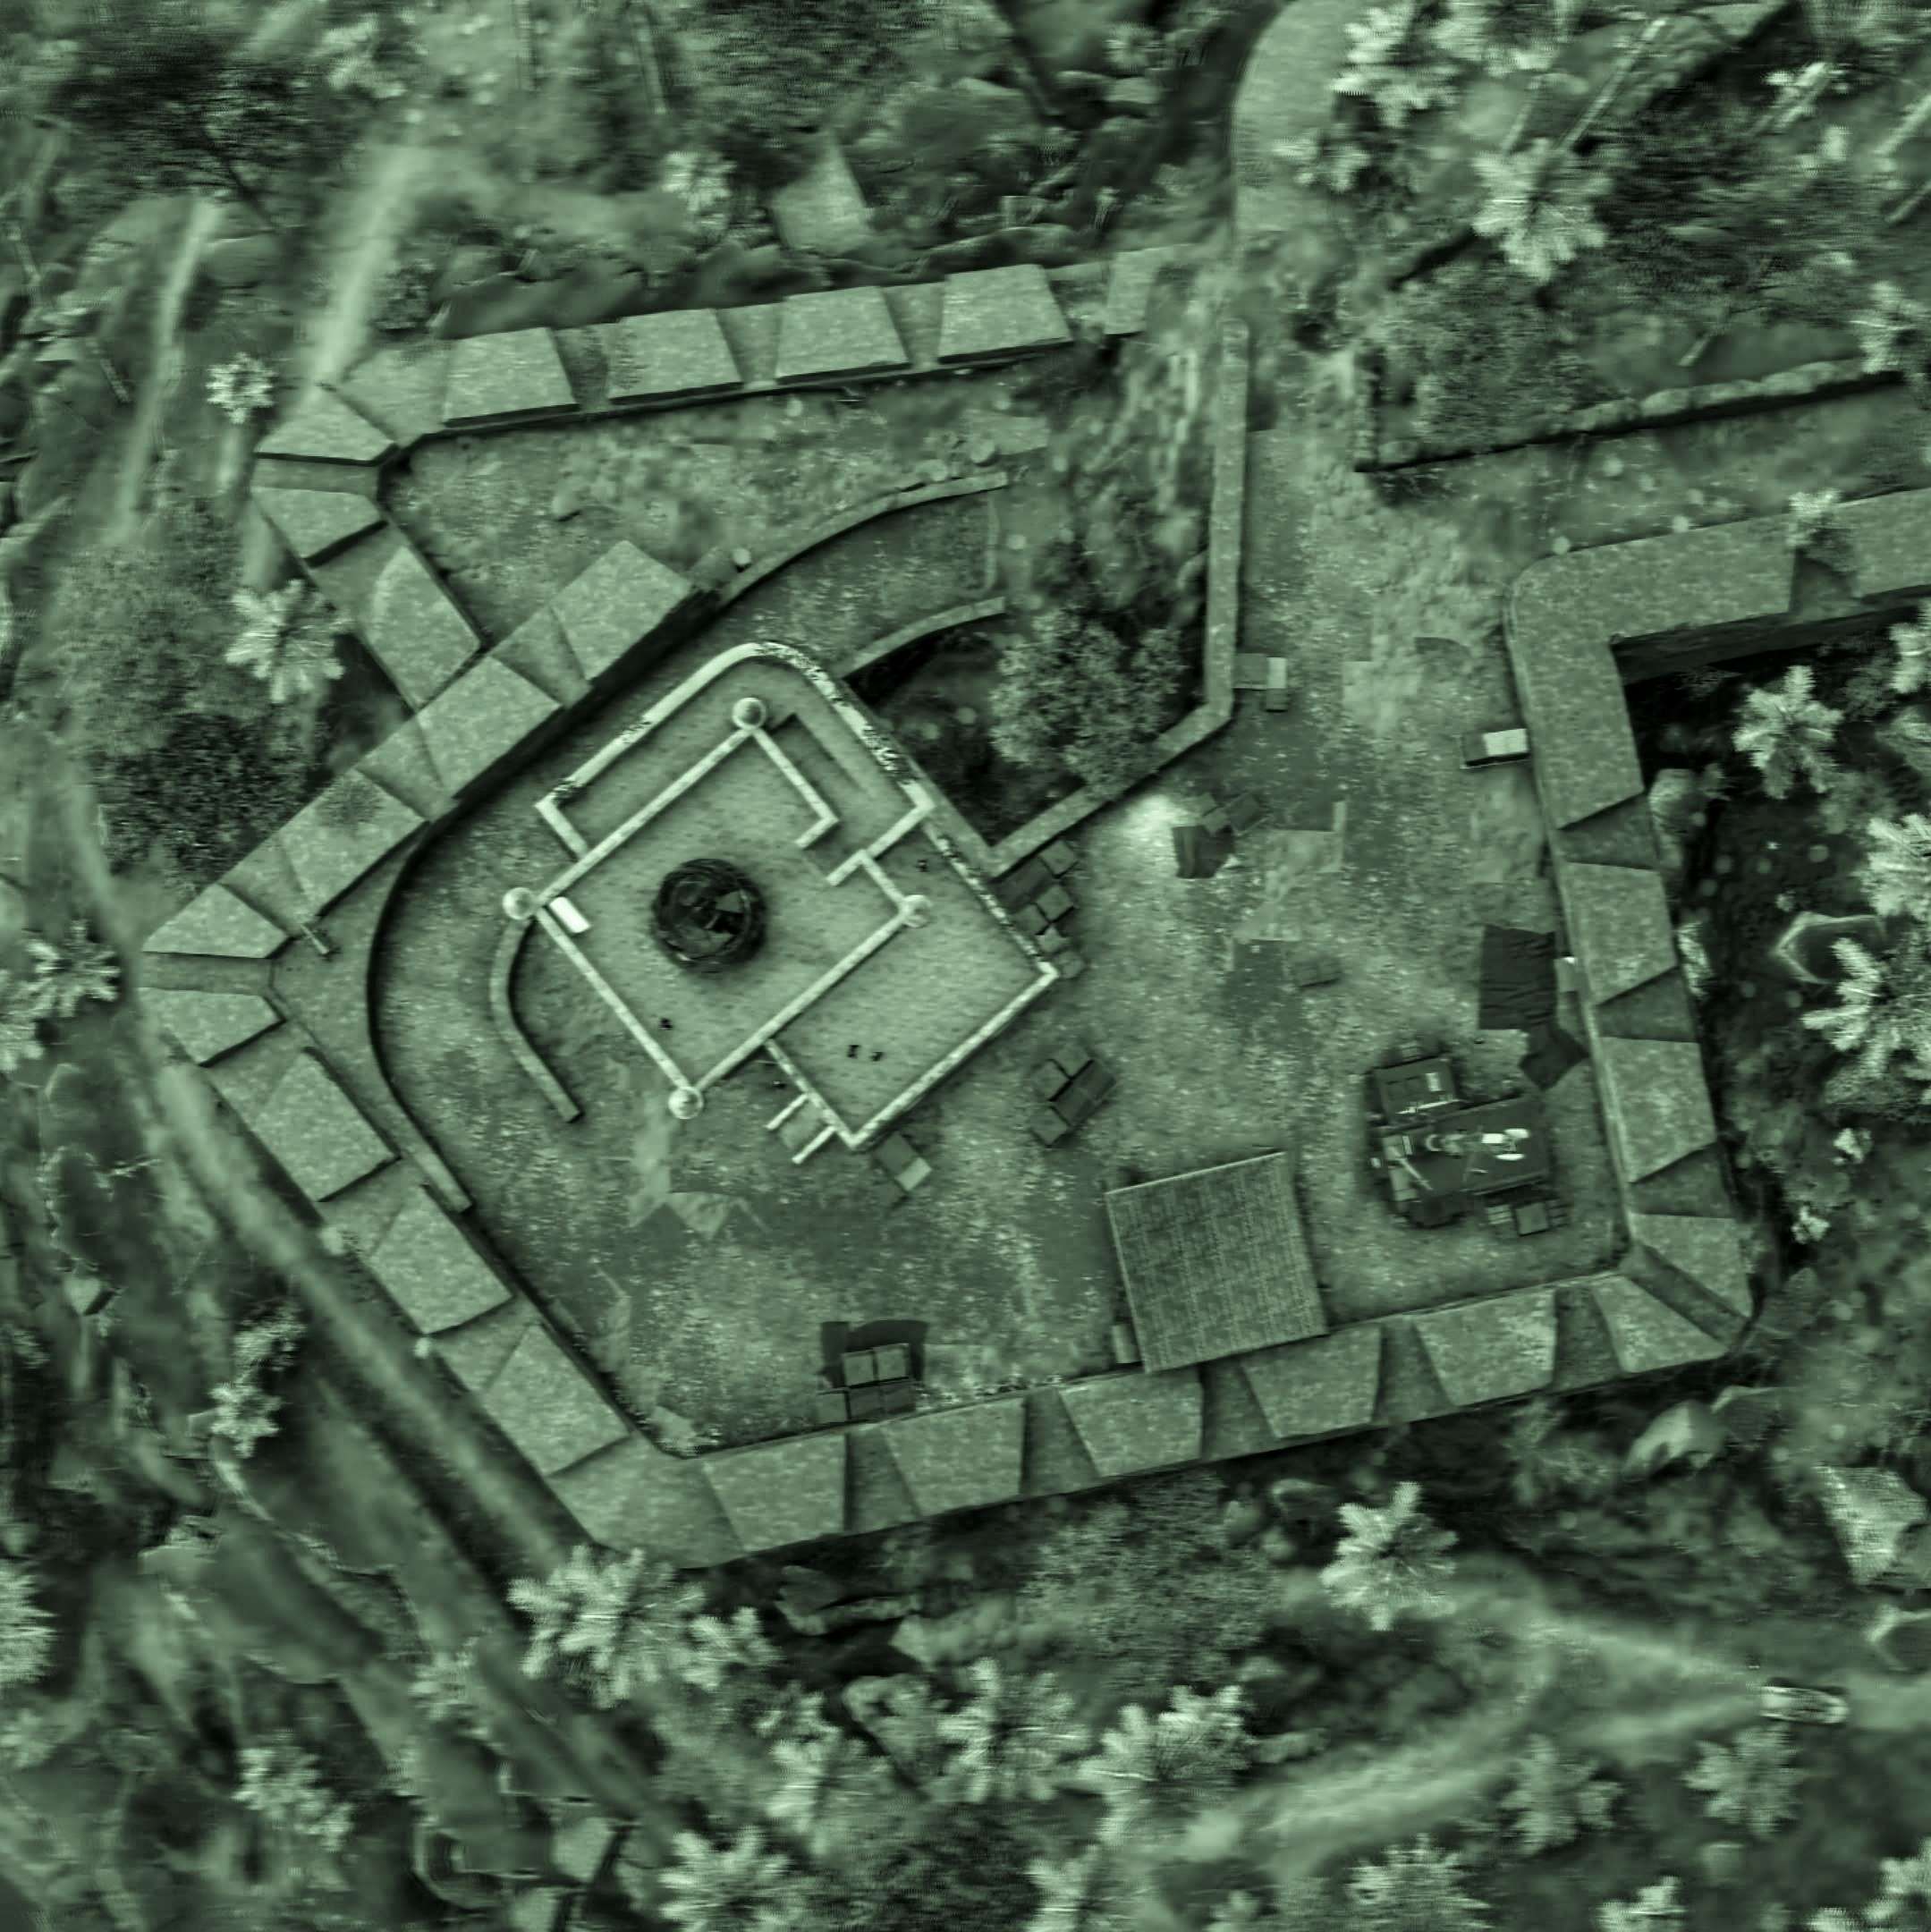
Spanish Fortress
BADGER capture reference for the close-guard position and the final approach to the HVT before handoff relocation.
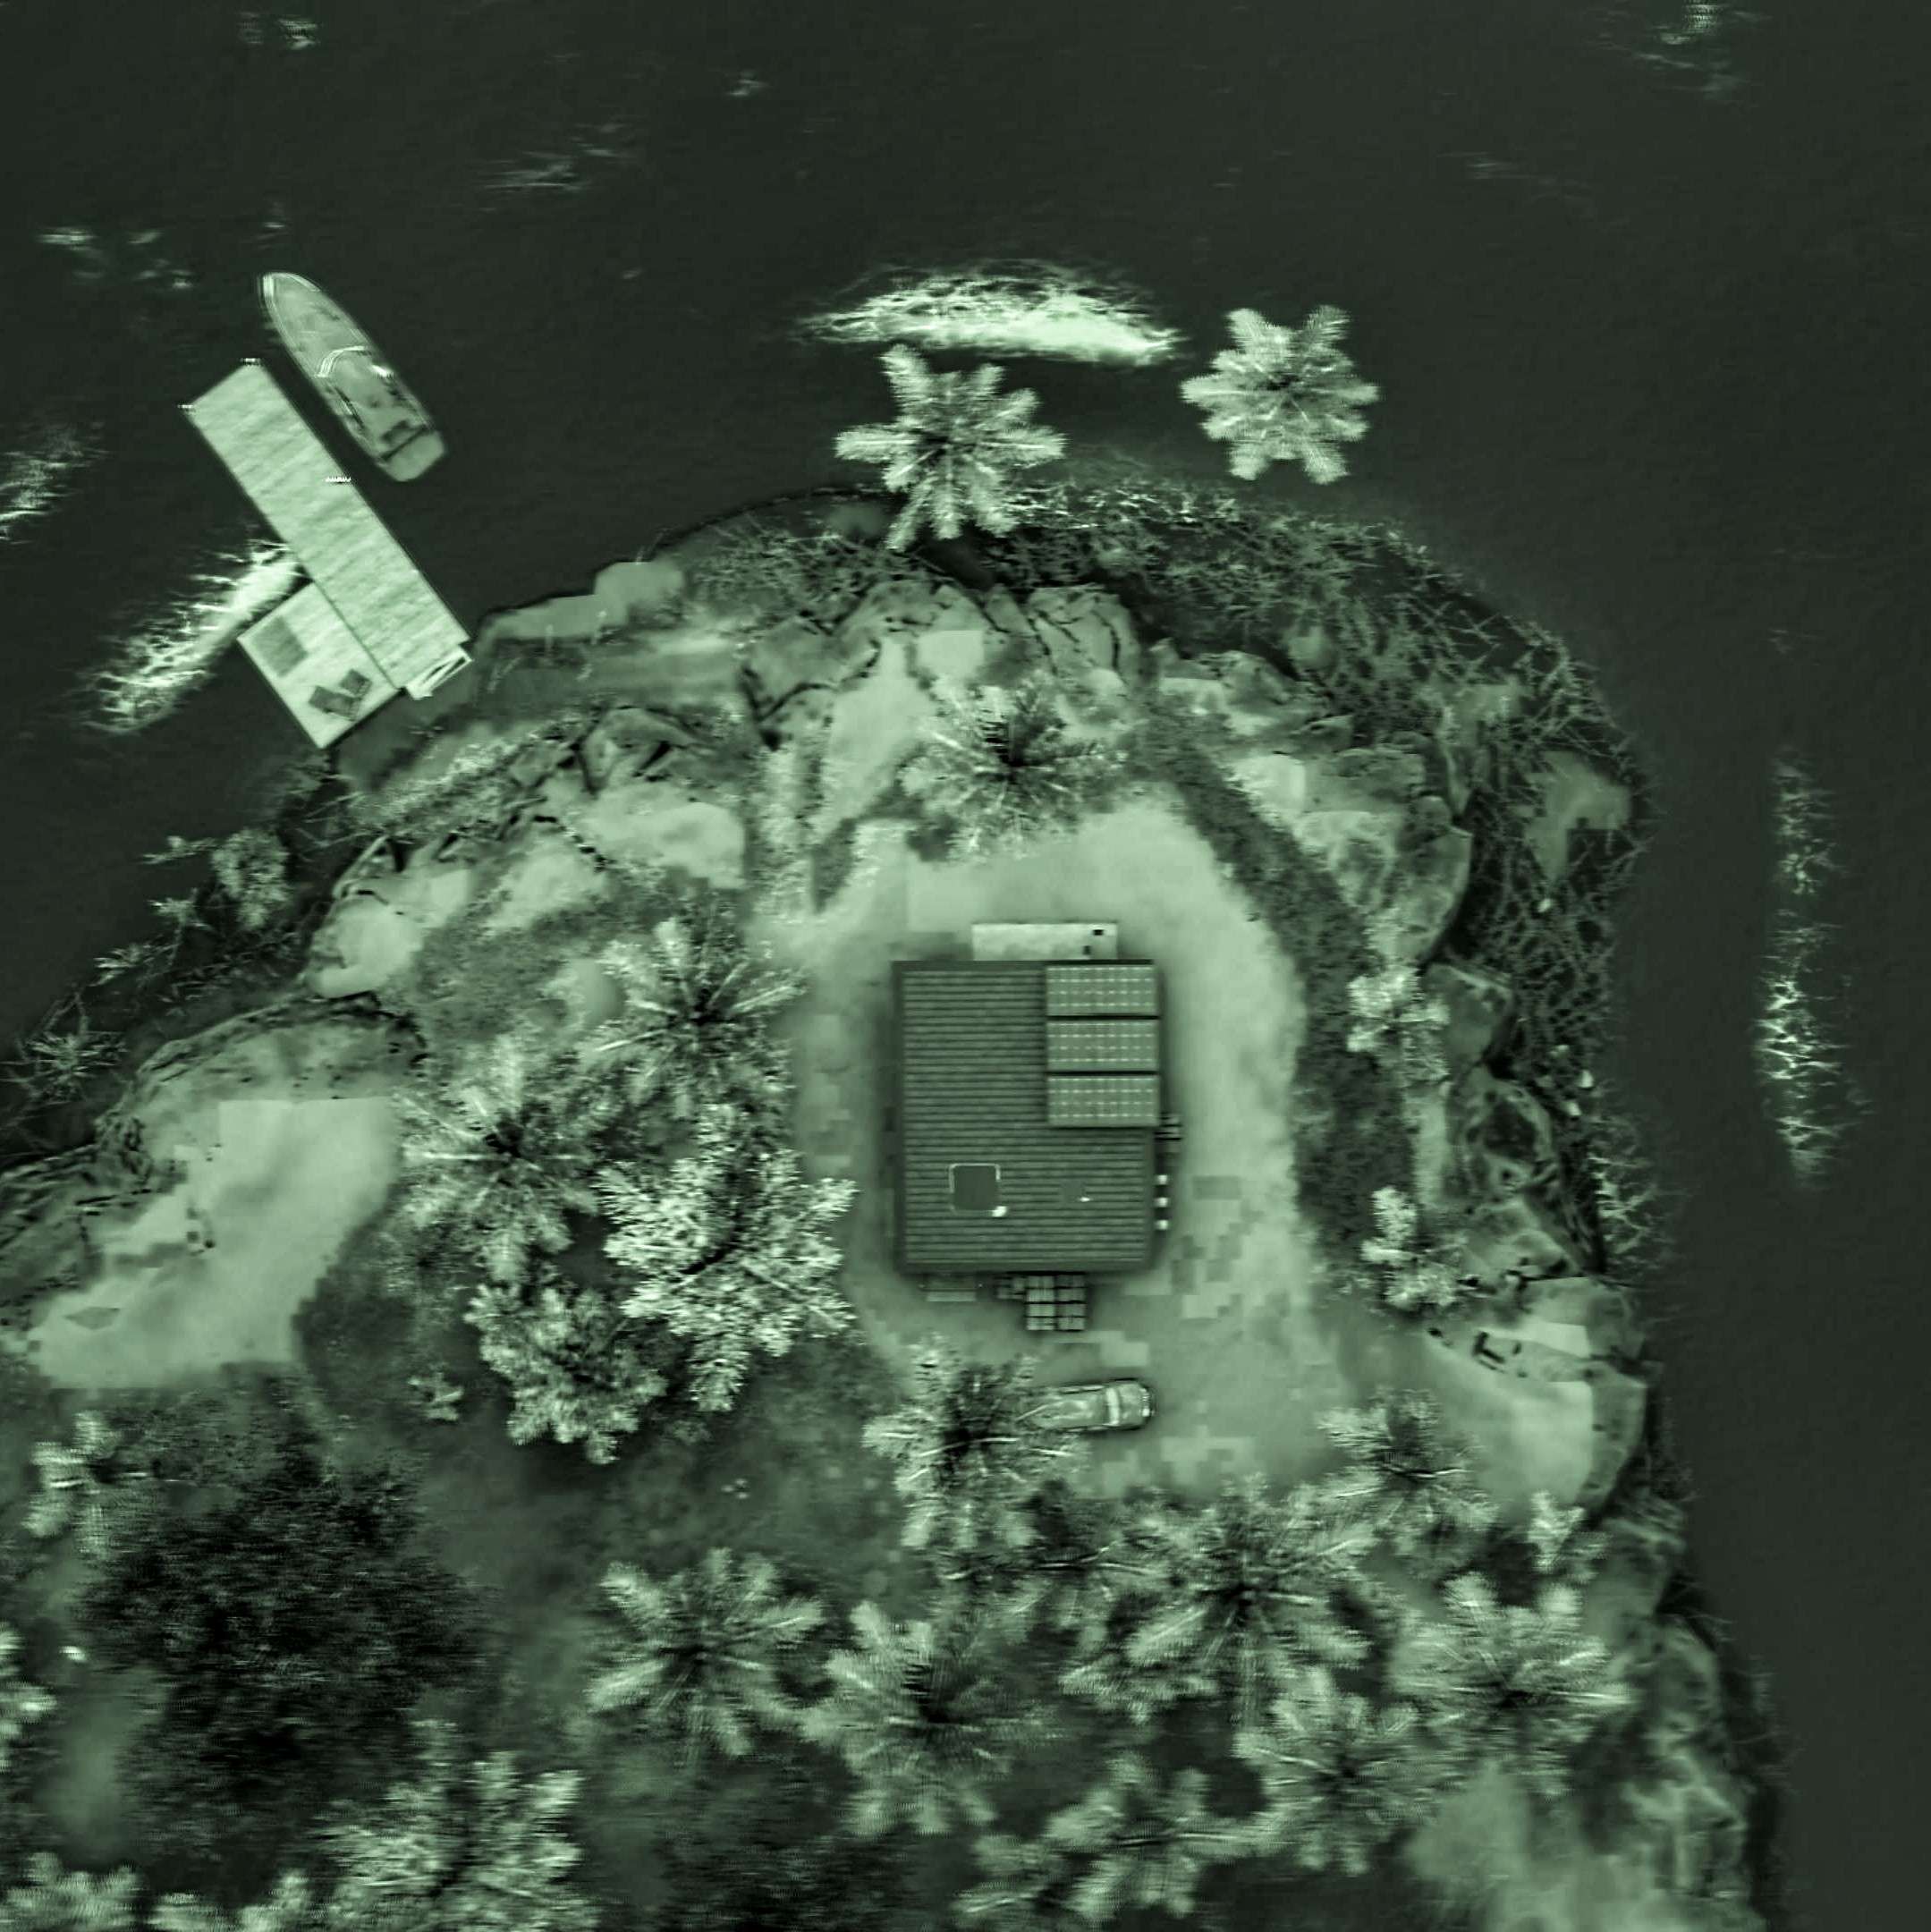
Safehouse ECHO 6
End-state reference for the BADGER handoff to Bravo Team and the on-site intel exploitation station used to close the mission.
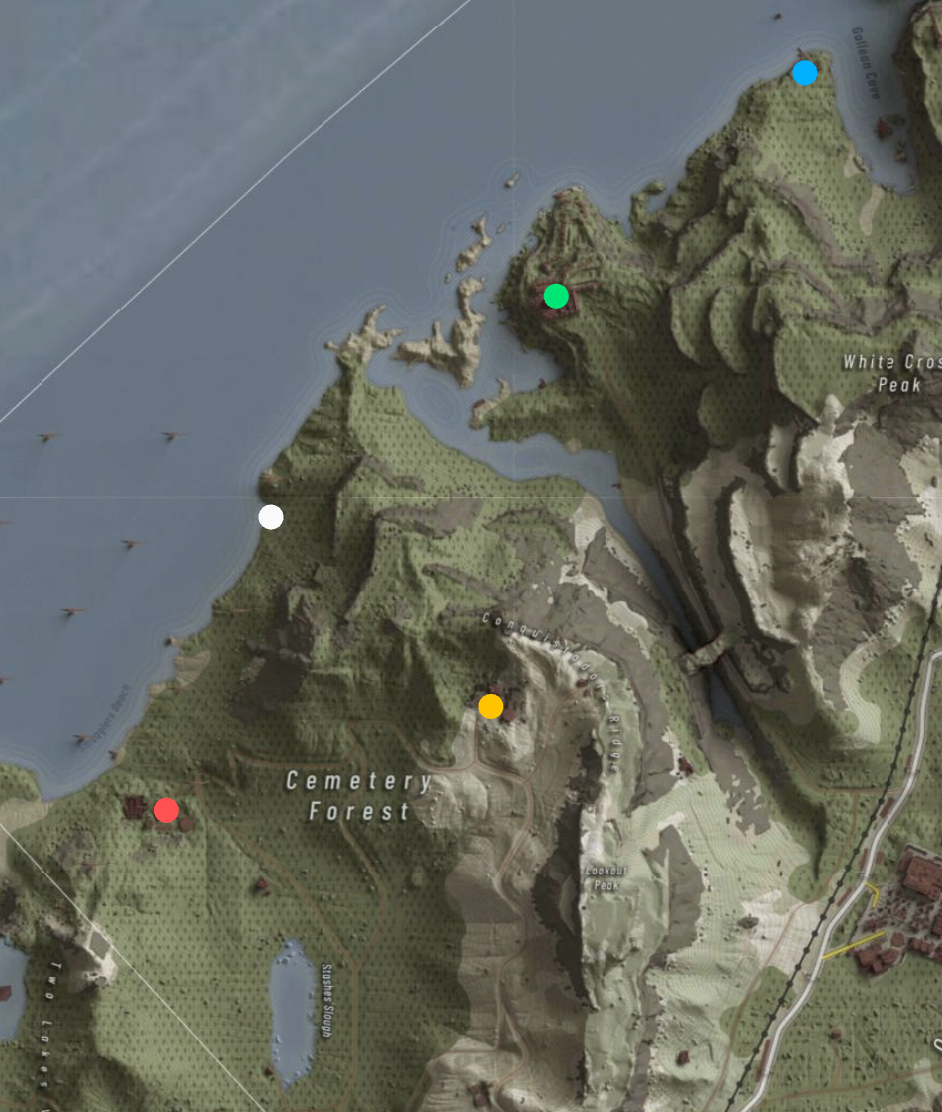
Tacmap Rundown
Full northwest Smugglers Cove route reference showing the dockside LZ, Alpha at Wind Farm W01, Bravo at Drone Station W011, Charlie at the Spanish Fortress, and the final handoff point at Safehouse ECHO 6.