Operation Harrier
Team Harrier will HAHO into Restricted Area 01 to recapture Camp Fox, rescue allied specialist MAYFLY, capture enemy JTAC HOPPER alive at the Prototype Workshop, and strip Control Station Fox 02 of its UGV-support role so rebels can hold the northern buffer.
Situation
Sentinel is pushing into the mountain range through a three-pronged posture centered on Camp Fox, the Prototype Workshop, and Control Station Fox 02. Camp Fox is the immediate problem, where allied weapons specialist MAYFLY was captured while investigating the site. Retaking it will allow rebel forces to establish a forward operating base on the ridge line.
To the east, the Prototype Workshop holds both civilians and HVT HOPPER, an enemy JTAC wanted for interrogation to prevent upcoming strikes. Control Station Fox 02 functions as a UGV repair and support node, so reclaiming it is necessary to break hostile pressure on the northern region and give local rebels room to fight back.
Execution
- Phase 1 HAHO to the rendezvous point before sundown ends, move on foot, and preserve surprise across the entire chain.
- Phase 2 Recapture Camp Fox first, then pivot to the Prototype Workshop for HVT capture and civilian liberation.
- Phase 3 Clear the UGV maintenance node, patrol to HLZ JUNO, and hand control of the cleared sites to local assets on standby.
Operational Need
The mission is about creating a defensible northern buffer. If these three sites stay in hostile hands, rebels cannot stabilize the mountain corridor.
Rescue Target
MAYFLY
Capture Target
HOPPER
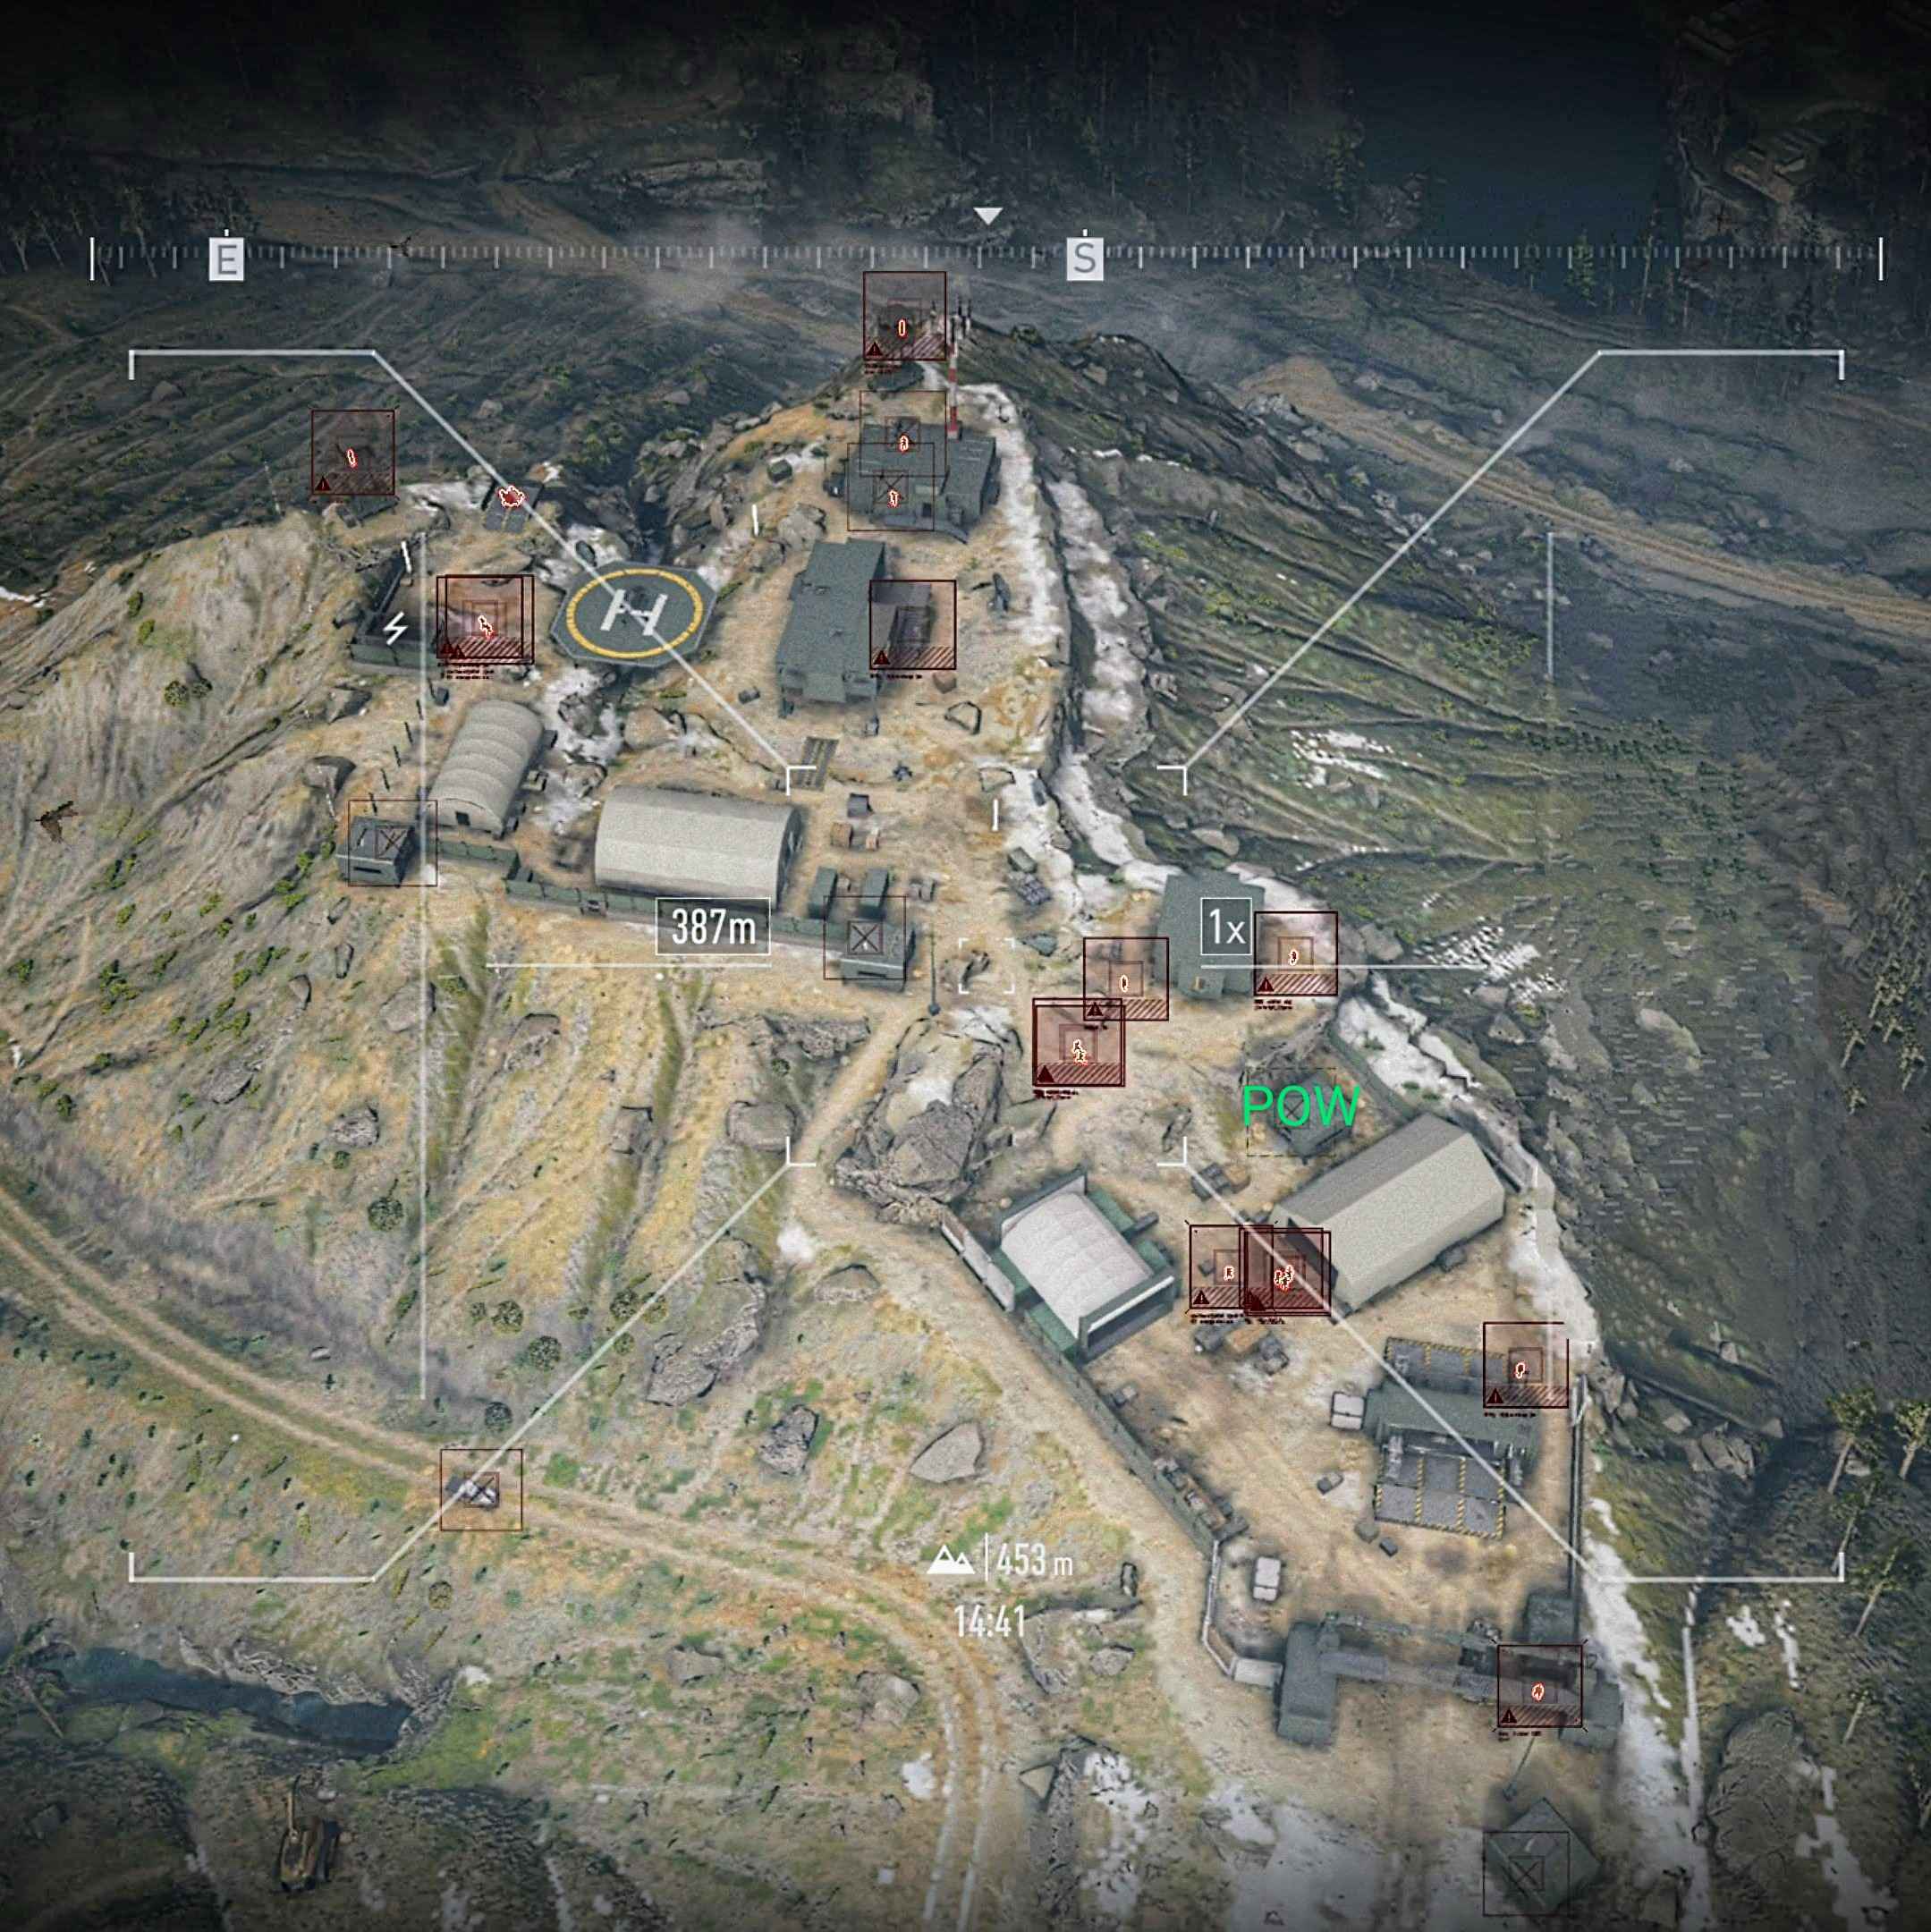
Camp Fox
Secure the camp, establish communication with BANDIT-1, and rescue MAYFLY.
ARMAROS ISR 1441 identified 21 hostile personnel in the area.
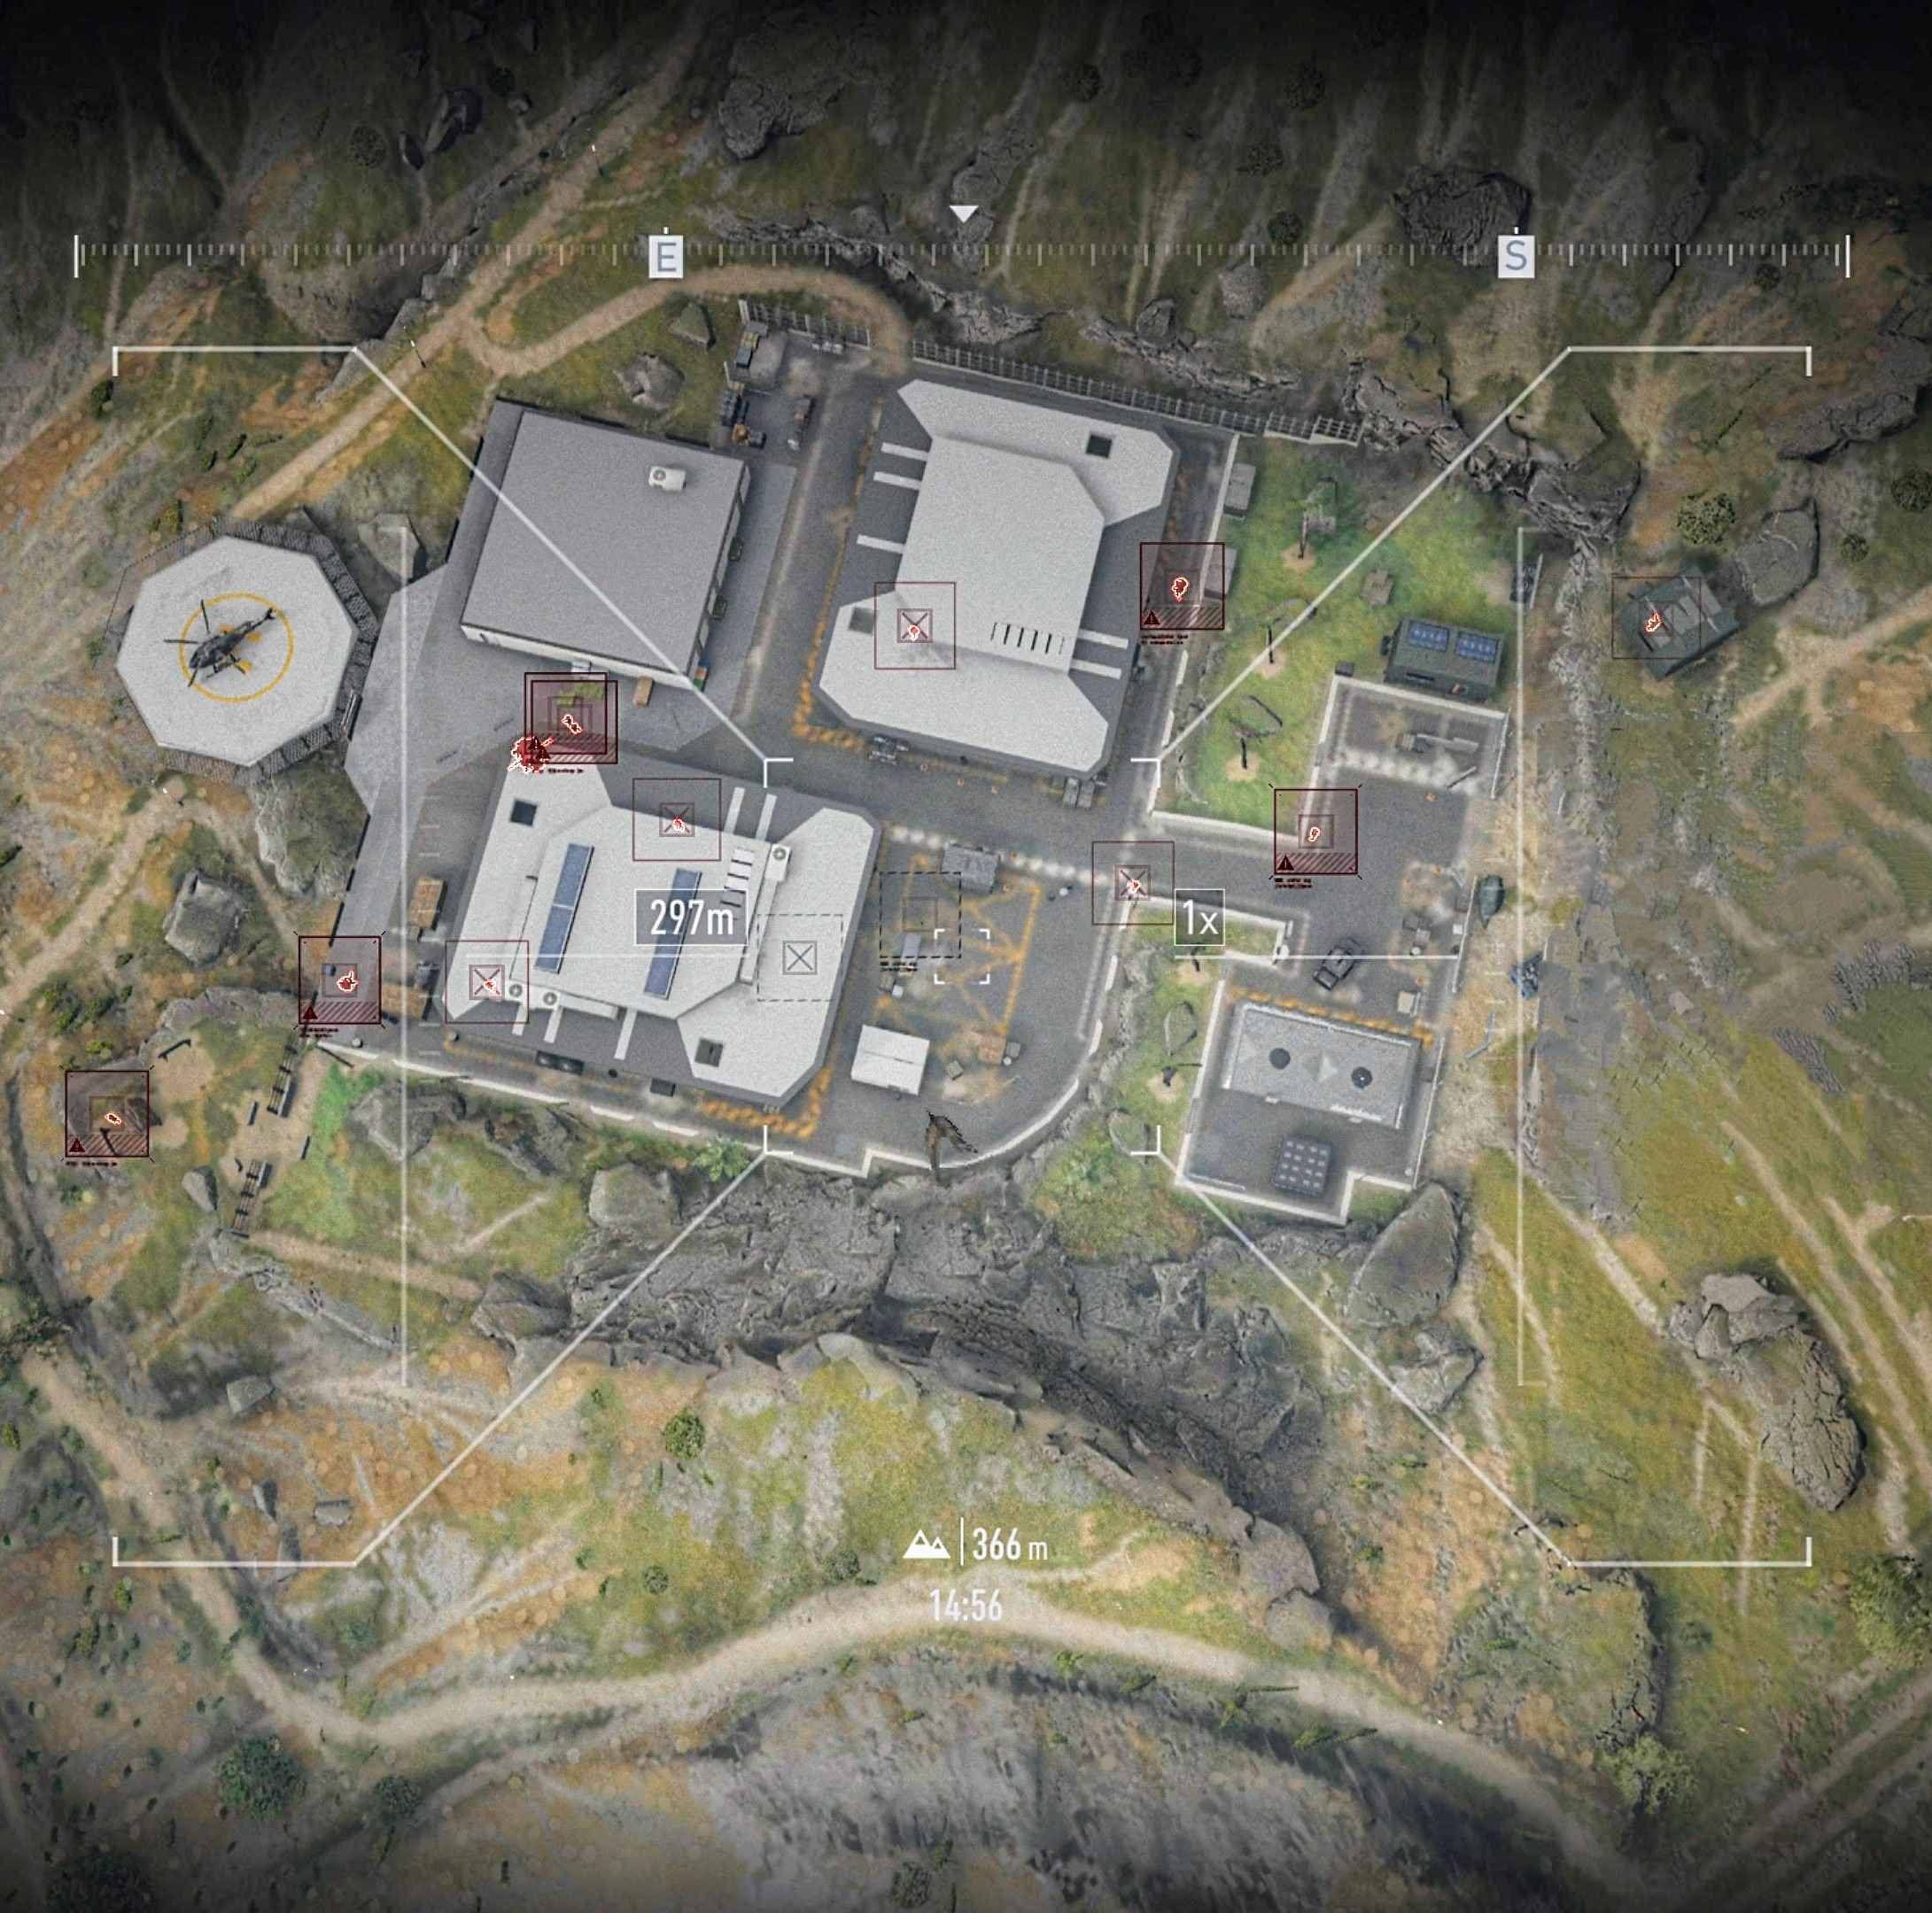
Prototype Workshop
Capture HVT HOPPER alive, liberate the civilians on site, and establish communication with BANDIT-2.
ARMAROS ISR 1456 identified 12 hostile personnel in the target zone.
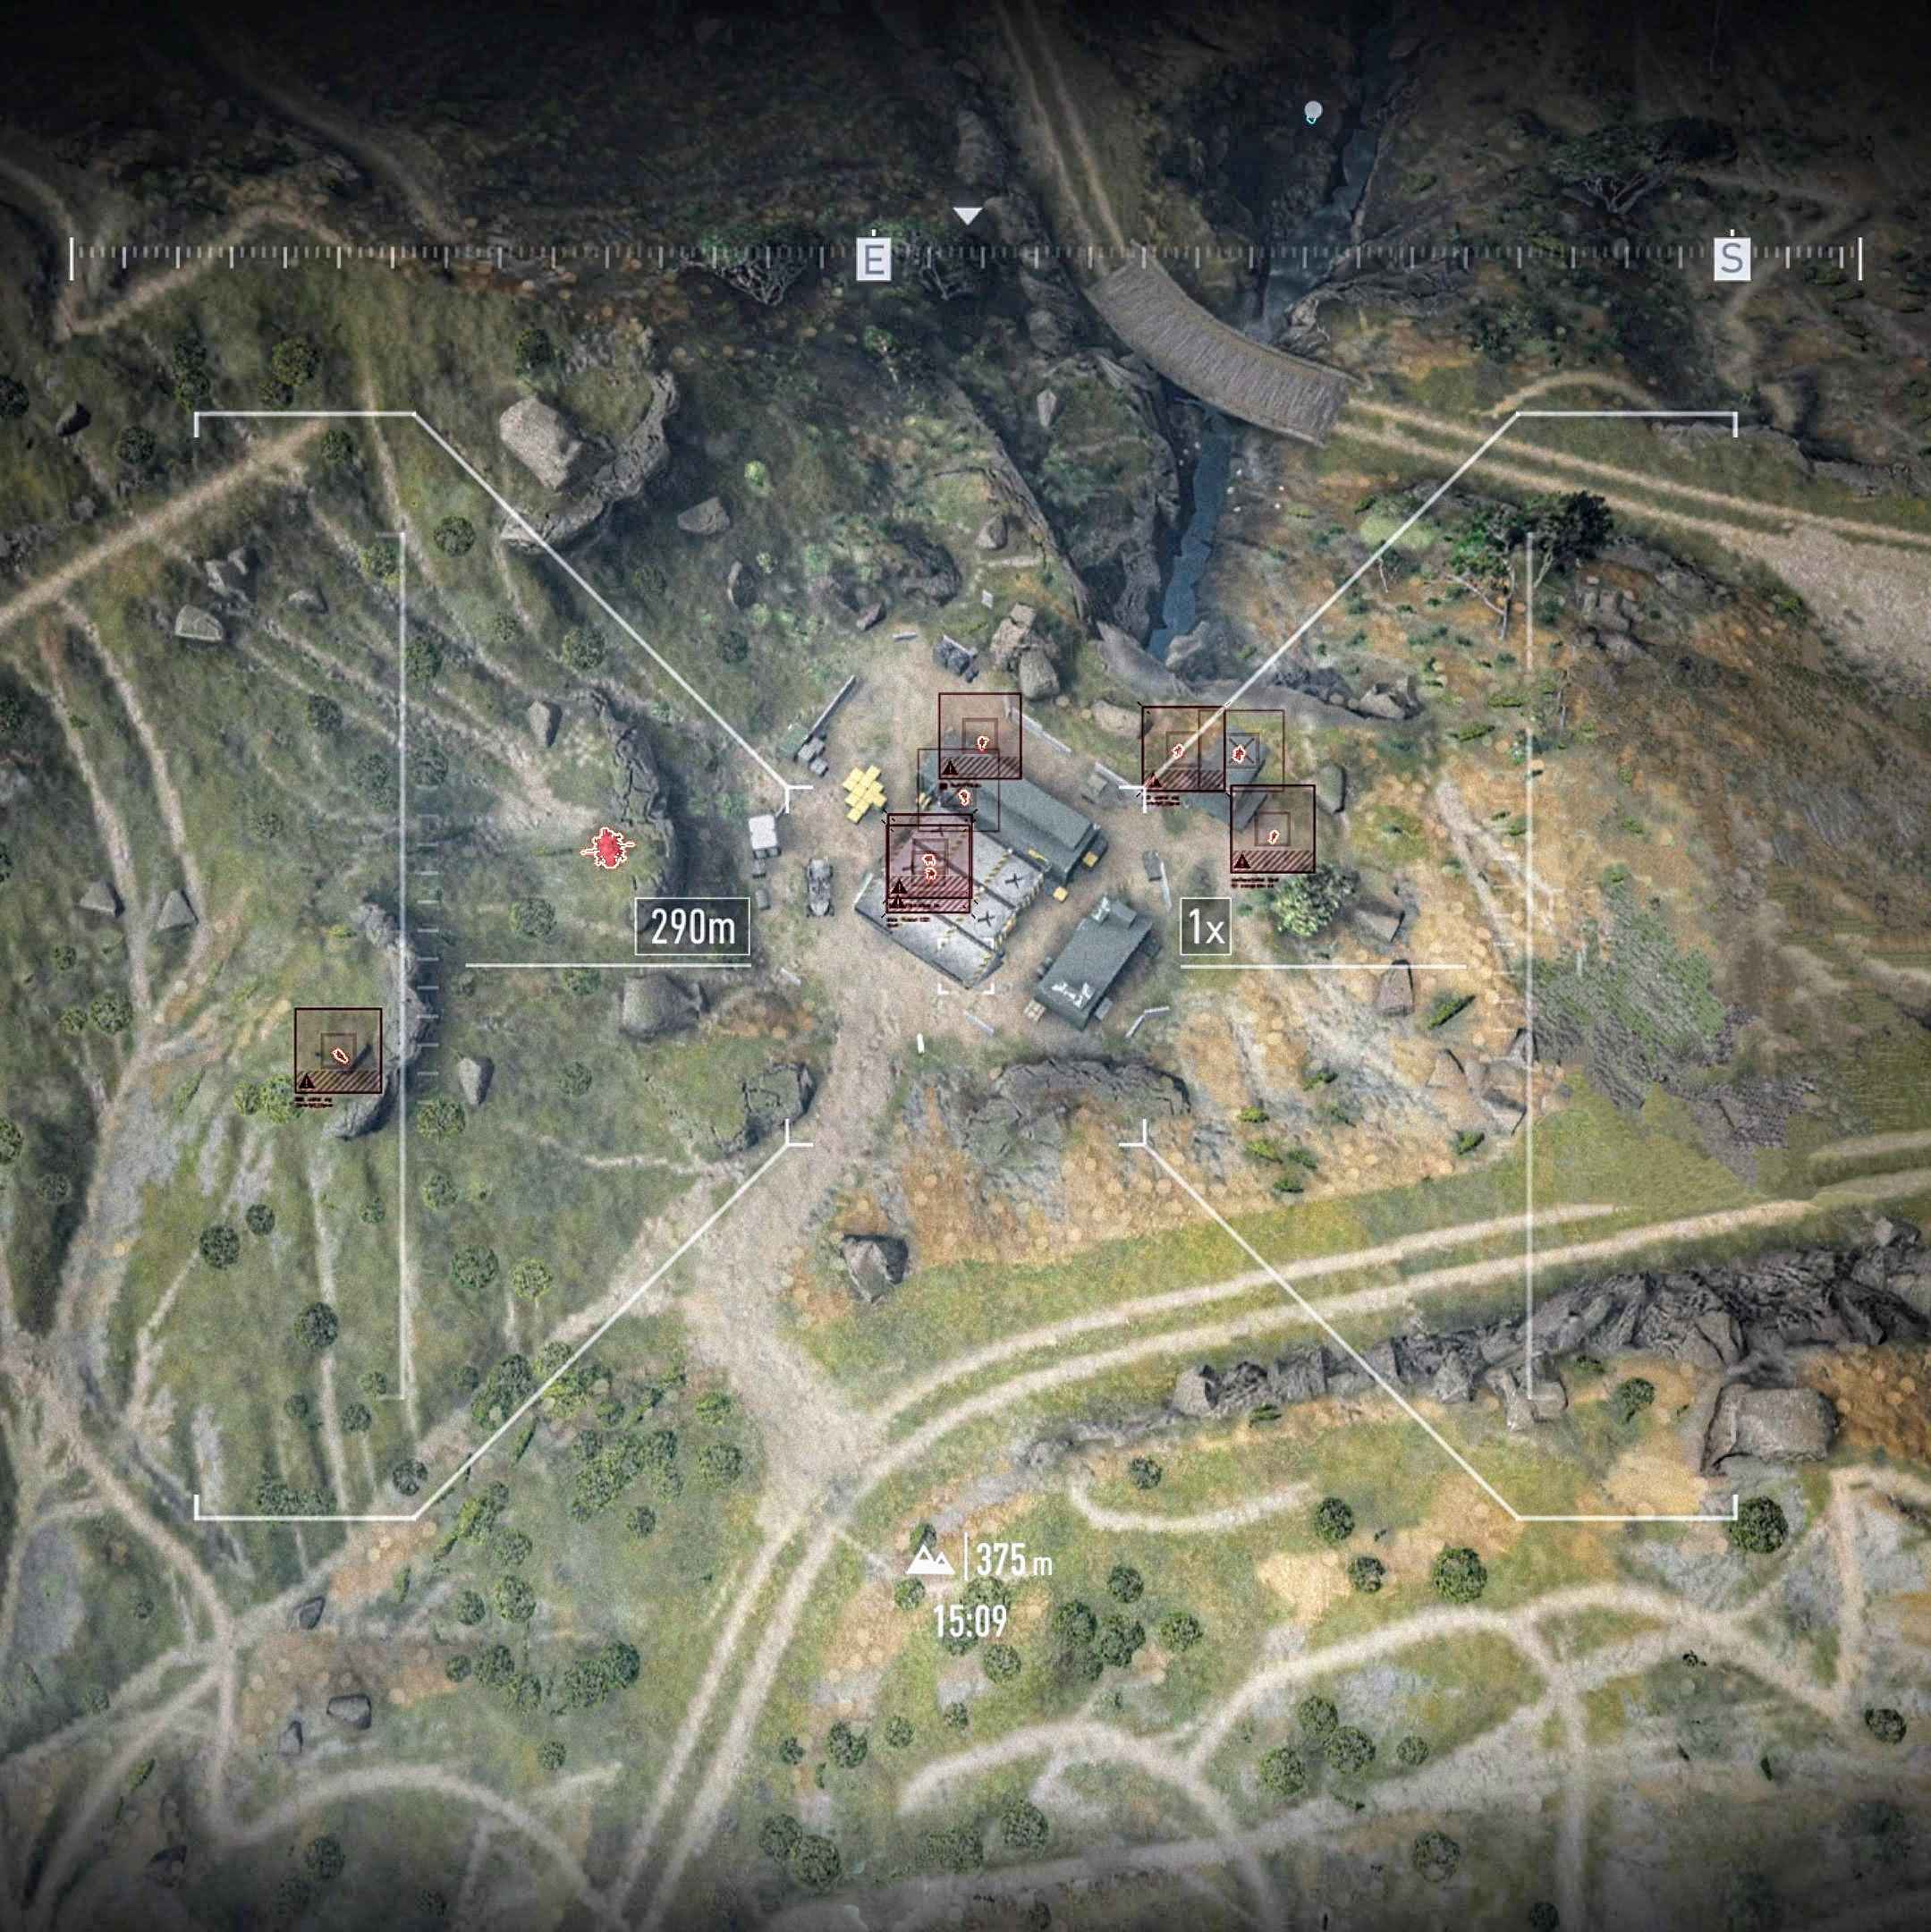
Control Station Fox 02
Eliminate hostile squads, collect UGV metric data at the maintenance station, and establish communication with BANDIT-3.
ARMAROS ISR 1509 identified 8 hostile personnel at the site.

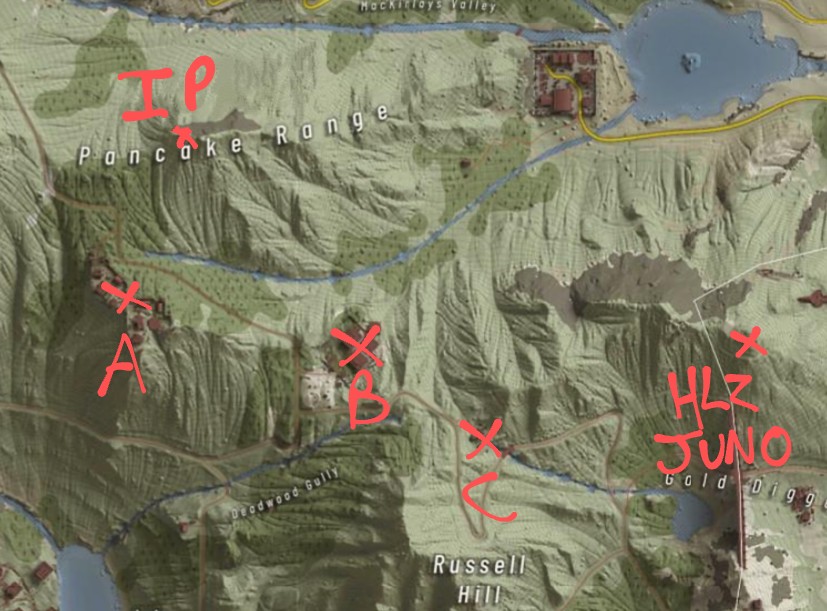
Restricted Area 01
Full-display tacmap reference for the HAHO approach, the three target sites, and the final movement to HLZ JUNO for NOVAR-1 pickup.